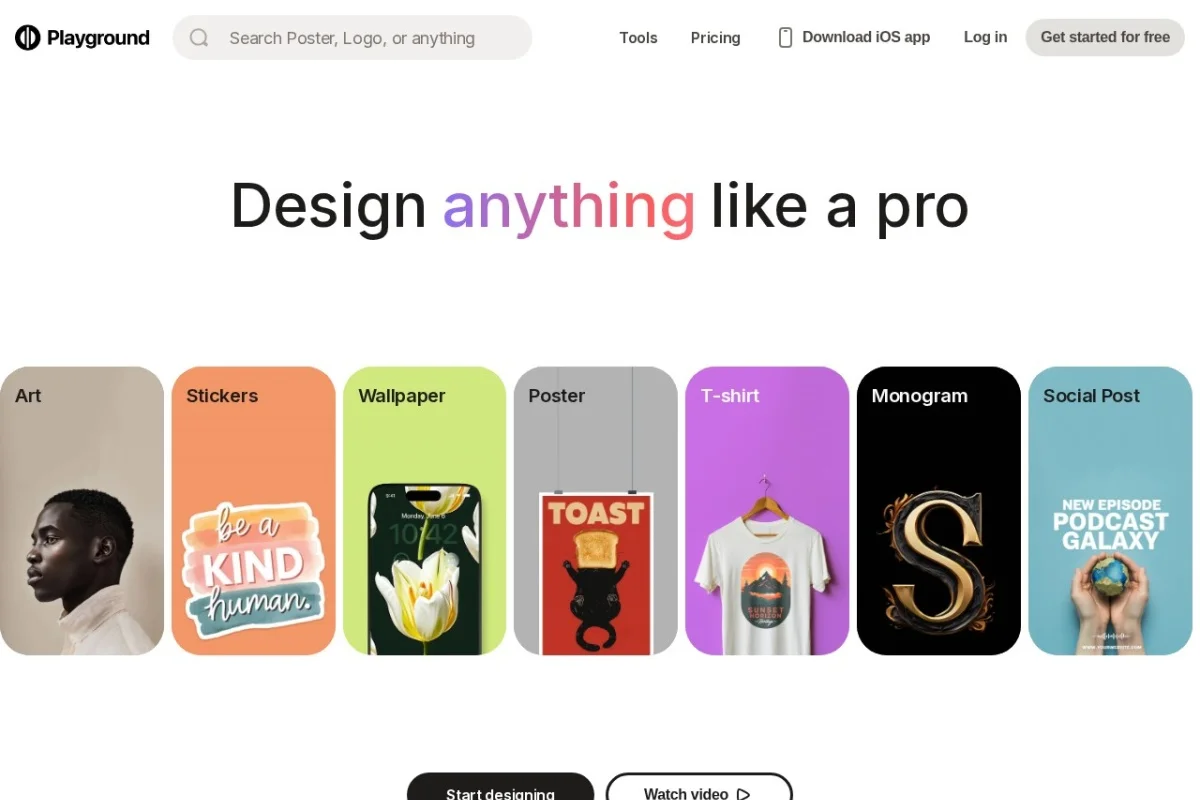
Introduction to Playground AI Design Tool
In today’s digital world, visual content is essential for branding, marketing, and personal expression. However, not everyone has the time, budget, or skills to use complex design software like Adobe Photoshop or Illustrator. This is where Playground AI Design Tool comes in. Playground is a free, web-based platform that uses generative artificial intelligence to turn simple text descriptions into professional-quality visuals. Whether you need a logo for your startup, a custom t-shirt design, or engaging social media graphics, Playground AI makes the process fast, intuitive, and accessible to anyone.
Unlike traditional design tools that require you to master layers, brushes, and color theory, Playground AI works by understanding your words. You describe what you want, and the AI generates multiple design options in seconds. The platform is designed with a clean, user-friendly interface that guides you step by step. Best of all, it is completely free to use, making it an ideal starting point for beginners, small business owners, content creators, and hobbyists who want to explore AI-powered design without any financial commitment.
This tutorial will walk you through everything you need to know about Playground AI, from creating your first account to generating your first design. You will learn about the key features, a detailed step-by-step workflow, and practical tips to get the best results. By the end of this guide, you will be able to confidently use Playground AI to bring your creative ideas to life.
Getting Started with Playground AI
Creating Your Account
To begin using Playground AI, you first need to create a free account. Visit the official website at https://playgroundai.com/. On the homepage, you will see a prominent “Sign Up” or “Get Started” button. Click on it, and you will be prompted to sign up using your Google account, Discord account, or an email address. For a beginner, signing up with Google is the fastest method, as it requires only one click. Once you complete the sign-up process, you will be logged into the Playground AI dashboard.
Understanding the Dashboard
After logging in, you will see the main dashboard. This is your control center. The interface is intentionally minimal to avoid overwhelming new users. On the left side, you will find a sidebar with options such as Create, Explore, and My Designs. The “Create” tab is where you will spend most of your time. The “Explore” tab displays designs made by other users, which can serve as inspiration. The “My Designs” tab stores all your previous creations so you can edit or download them later.
Selecting a Design Type
Playground AI offers specific templates for different use cases. When you click “Create,” you will see options like Logo, T-Shirt, Social Media Post, and Custom. For beginners, it is recommended to start with a template, as it automatically sets the correct dimensions and aspect ratio for that type of design. For example, choosing “Social Media Post” will give you a square format perfect for Instagram, while “T-Shirt” will provide a rectangular canvas suitable for print.
Key Features of Playground AI
Text-to-Image Generation
The core feature of Playground AI is its ability to generate images from text prompts. You simply type a description of what you want, and the AI creates it. For example, typing “a minimalist logo of a mountain with a rising sun” will produce several logo variations. You can be as specific or as creative as you like. The AI understands style descriptors such as “watercolor,” “vector art,” “3D render,” “cartoon,” and “photorealistic.”
AI-Powered Editing
Playground AI is not just a generator; it also allows you to edit existing images. You can upload an image you already have or use one generated by the AI. Then, you can use tools like Inpainting to replace specific parts of the image, Outpainting to extend the canvas beyond the original borders, and Remove Background to isolate objects. These editing features are powered by AI and require no manual selection or masking.
Style and Model Selection
Playground AI offers different AI models and styles. The default model is optimized for general use, but you can switch to models that specialize in photorealism, illustration, or anime. Additionally, you can apply style presets like “Vibrant,” “Moody,” “Retro,” or “Minimalist.” This gives you control over the aesthetic of your output without needing to describe every detail in your prompt.
Negative Prompting
An advanced yet beginner-friendly feature is the ability to use negative prompts. This tells the AI what you do NOT want to see in the image. For example, if you are designing a logo and want to avoid complex backgrounds, you can add “no background, no text, no clutter” as a negative prompt. This helps refine the results and reduces the need for multiple attempts.
Free Credits and Usage
Playground AI operates on a credit system. New users receive a generous amount of free credits upon signing up. Each generation or edit consumes a small number of credits. Credits are replenished daily or weekly, depending on the current promotion. For most beginners, the free credits are more than enough to experiment and create several designs. There is no need to enter a credit card to start.
How to Use Playground AI: A Step-by-Step Guide
Step 1: Start a New Project
From the dashboard, click the “Create” button. You will be presented with a list of templates. For this guide, we will create a logo. Click on the “Logo” template. The canvas will automatically resize to a square format, which is standard for logos.
Step 2: Write Your Prompt
At the bottom of the screen, you will see a text box labeled “Enter your prompt”. This is where you describe your design. Be clear and descriptive. For example, instead of writing “a dog logo,” write “a modern vector logo of a golden retriever, clean lines, blue and white color scheme, professional.” The more detail you provide, the closer the AI will get to your vision. You can also use the “Style” dropdown menu to select a preset like “Minimalist” or “Bold.”
Step 3: Configure Negative Prompts and Settings
Below the prompt box, look for the “Negative Prompt” field. Here, you can type things like “blurry, low quality, distorted, text, watermark.” This helps eliminate unwanted elements. Next, check the “Model” dropdown. For logos, the “Playground v2” model works well. You can also adjust the “Guidance Scale” slider. A higher number (e.g., 12) makes the AI follow your prompt more strictly, while a lower number (e.g., 7) allows for more creative variation. For beginners, leaving it at the default setting is perfectly fine.
Step 4: Generate Your Design
Once your prompt and settings are ready, click the “Generate” button. The AI will process your request and display a grid of four different variations of your design. This usually takes between 10 to 30 seconds. You can scroll through the results and see which one matches your expectations.
Step 5: Select and Refine
If you like one of the generated designs, click on it to select it. A toolbar will appear above the image. You have several options here:
- Upscale: Increases the resolution of the image, making it suitable for printing.
- Edit: Opens the image in the editing mode, where you can use inpainting or outpainting.
- Variations: Creates new versions based on the selected design.
- Download: Saves the image to your computer.
If none of the four results are satisfactory, you can click “Generate” again with a modified prompt. Do not be afraid to experiment. AI design is an iterative process.
Step 6: Edit Your Design (Optional)
For a logo, you might want to remove the background or add a text element. Click the “Edit” button. In the editing interface, you will see tools like “Remove Background” on the right side. Click it, and the AI will automatically detect and remove the background. You can then download the logo with a transparent background, which is essential for placing it on websites, business cards, or merchandise.
Step 7: Download Your Final Design
After you are happy with your design, click the “Download” button. You will be prompted to choose a file format. For logos, PNG is recommended because it supports transparency. For social media graphics, JPG is often sufficient. The download will start immediately. Your design is also saved in the “My Designs” section of your account.
Practical Examples of Use Cases
Creating a T-Shirt Design
To design a t-shirt, start a new project and select the “T-Shirt” template. Write a prompt like “retro 80s sunset with palm trees, neon colors, vector art, for a t-shirt print.” After generation, you can use the “Remove Background” tool to isolate the design. Then download it as a PNG and upload it to a print-on-demand service like Printful or Redbubble.
Designing Social Media Graphics
For a social media post, select the “Social Media Post” template. Write a prompt such as “inspirational quote background, soft pastel colors, abstract waves, minimal text space.” Generate a few options, then download the one you like. You can later add your own text using free tools like Canva or even directly in Playground AI’s edit mode if you prefer.
Tips for Getting the Best Results
Write Detailed Prompts
The quality of your output is directly tied to the quality of your input. Avoid vague words like “nice” or “cool.” Instead, use descriptive adjectives: “sleek,” “rustic,” “futuristic,” “hand-drawn.” Specify colors, composition, and mood. For example, “a dark blue and gold geometric logo, symmetrical, professional” will yield much better results than “a logo.”
Use Negative Prompts Wisely
Negative prompts are your best friend for removing common AI artifacts. Always include terms like “blurry, low quality, deformed, extra limbs, text” unless you specifically want those elements. This dramatically improves the consistency of your designs.
Experiment with Different Models
Do not stick to just one AI model. If you are designing a photorealistic product mockup, switch to the “Realistic Vision” model. For illustrations, try “Stable Diffusion XL.” Each model has strengths, and exploring them will expand your creative possibilities.
Iterate and Refine
Rarely does the first generation produce a perfect result. Use the “Variations” feature to tweak a design you almost like. You can also take a generated image and use the “Edit” tool to inpaint specific areas. For example, if the logo has a shape you dislike, you can highlight that area and write a new prompt like “replace with a star shape.”
Keep It Simple for Logos
For logos, less is often more. Avoid overly complex scenes. Focus on a single, strong visual element. Use negative prompts to remove backgrounds and unnecessary details. A good logo should be recognizable even when scaled down to a small size.
Check Credit Usage
While Playground AI is free, each generation consumes credits. Keep an eye on your credit balance, which is displayed in the top right corner of the dashboard. If you run low, you can wait for the daily refresh or create a new account (though using multiple accounts is generally unnecessary for casual use).
Explore Community Designs
Before starting your own project, spend a few minutes in the “Explore” tab. You can see the exact prompts other users used to create beautiful designs. This is an excellent way to learn how to structure your own prompts. You can even copy a prompt and modify it for your own needs.
Conclusion
Playground AI Design Tool is a powerful gateway into the world of AI-assisted creativity. It removes the technical barriers of traditional design software and puts the ability to create professional visuals into the hands of anyone with an idea. Whether you are a small business owner needing a logo, a content creator looking for eye-catching social media graphics, or simply someone who wants to design a custom t-shirt for fun, Playground AI provides the tools you need in a free, accessible package.
By following the steps outlined in this tutorial, you can go from a blank canvas to a finished design in just a few minutes. Remember to write clear prompts, use negative prompts to refine results, and experiment with different styles and models. The more you use Playground AI, the better you will understand how to communicate with the AI to achieve your desired outcome. Start your first project today at https://playgroundai.com/ and discover how easy and enjoyable AI-powered design can be.

Playground AI Design Tool
Free AI tool for creating logos, t-shirts, and social media graphics.