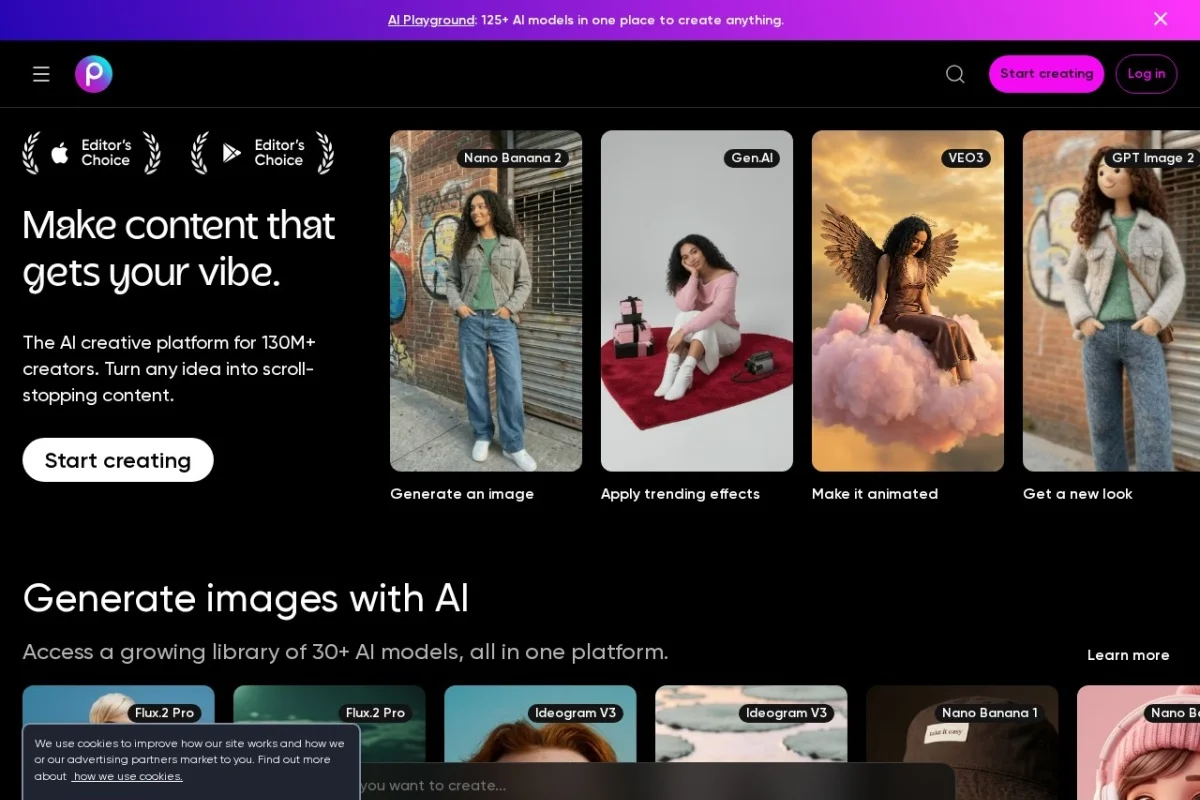
Introduction to Picsart: The All-in-One AI Creative Platform
In today’s fast-paced digital world, creating high-quality visual content quickly is no longer a luxury—it’s a necessity. Whether you are a social media manager, a small business owner, a student, or simply someone who loves to experiment with digital art, you need tools that are both powerful and easy to use. Enter Picsart, a comprehensive AI-powered creative platform that puts over 30 AI models, a massive library of templates, and professional-grade editing tools right at your fingertips.
Unlike traditional photo editing software that requires hours of learning complex menus, Picsart is designed for speed and accessibility. It combines the best of classic design tools (like layers, text, and filters) with cutting-edge generative AI. This means you can type a description to generate a unique image, animate a still photograph, swap a subject’s clothing, or transform a video into an anime-style clip—all within a single, browser-based interface.
This tutorial will walk you through everything you need to know to start using Picsart effectively. We will cover the basics of setting up your account, explore the key features that make this platform unique, and provide step-by-step instructions for common tasks. By the end, you will be ready to create professional-looking content in minutes.
Getting Started with Picsart
Before you can dive into the creative tools, you need to set up your workspace. Picsart is available as a web application (accessible via the URL provided) and as a mobile app for iOS and Android. For this tutorial, we will focus on the web version, which offers the most complete feature set.
Creating Your Account
Navigate to picsart.com. Click the “Sign Up” button located in the top right corner. You can register using your Google account, Apple ID, or an email address. The free tier gives you access to a generous selection of AI tools and templates, though some advanced features and premium assets require a paid subscription.
Understanding the Dashboard
Once you log in, you will see the main dashboard. This is your command center. The interface is clean and intuitive, divided into three primary areas:
- The Left Sidebar: This contains the main navigation menu. Here you will find links to “Create,” “AI Tools,” “Templates,” and your personal “Projects” and “Uploads.”
- The Central Canvas: This is where your work happens. When you start a new project, the canvas will appear here.
- The Top Toolbar: This bar changes depending on the tool you are using. It typically includes options for undo/redo, saving, exporting, and adjusting canvas size.
Choosing Your First Project
To begin, click the “Create” button in the left sidebar. A drop-down menu will appear with several options: “Blank Canvas,” “AI Image,” “Collage,” and “Design.” For beginners, starting with a “Blank Canvas” or a “Template” is recommended. Templates are pre-designed layouts for social media posts, stories, banners, and more. Simply select a template, and you can edit the text, images, and colors instantly.
Key Features of Picsart
Picsart’s strength lies in its diversity. It is not just a filter app; it is a full creative suite. Below are the standout features that make it a must-try tool.
1. Generative AI Image Creation (30+ Models)
This is the heart of the platform. Picsart offers over 30 different AI models that can generate images based on text prompts. These models range from realistic photographic styles to specific artistic genres like oil painting, cyberpunk, and 3D renders. You can access this feature by clicking “AI Image” in the left sidebar.
2. AI Effects and Filters
Beyond basic color correction, Picsart uses AI to apply sophisticated effects. You can turn a photograph into a sketch, a cartoon, or a neon sign. The “AI Effects” library is constantly updated with trending styles. Unlike manual filters, these AI effects analyze the content of your image to apply the transformation intelligently.
3. AI Animation
Breathing life into static images is one of the most popular features. Picsart allows you to animate images and videos in several ways. You can use “AI Motion” to add subtle movements like flowing hair or moving clouds to a still photo. You can also create “AI Avatars” that mimic your facial expressions.
4. AI Clothes Swap and Scene Change
This feature is particularly useful for e-commerce and fashion content. The “AI Clothes Swap” tool can automatically detect clothing in a photo and replace it with a different style or color. Similarly, “AI Background” allows you to change the scene of a photo without needing to use complex masking tools. Simply select the subject, and the AI will remove the background and place them in a new environment.
5. Anime-Style Transformation
If you are a fan of anime or manga, you will love this feature. Picsart can convert your photos and videos into anime-style art. This is not a simple filter; it uses a dedicated AI model that redraws facial features, lighting, and textures to match the aesthetic of Japanese animation.
6. Picsart Flow
Flow is a design automation tool. It allows you to create a sequence of actions (like applying a filter, adding a text layer, and resizing) and apply that sequence to multiple images with one click. This is a massive time-saver for batch editing content for a brand or social media campaign.
How to Use Picsart: Step-by-Step Guides
Now that you understand the tools, let’s walk through how to use the most common features. We will focus on practical, real-world applications.
How to Generate an AI Image
This is the fastest way to create original artwork.
- Step 1: From the dashboard, click “AI Image” in the left sidebar.
- Step 2: You will see a text box labeled “Describe your image.” Write a detailed prompt. For example: “A cozy coffee shop interior at sunset, warm lighting, wooden tables, photorealistic style, 8K.”
- Step 3: Below the text box, select your AI model. For a realistic look, try “Realistic” or “HD.” For a fantasy look, try “Anime” or “Fantasy Art.”
- Step 4: Choose an aspect ratio (e.g., 1:1 for Instagram, 16:9 for YouTube thumbnails).
- Step 5: Click “Generate.” The AI will produce four variations. You can click on any image to open it in the editor for further tweaks.
How to Animate a Still Image
This feature adds motion to your photos, making them perfect for social media stories.
- Step 1: Open any image in the Picsart editor by clicking “Create” and then “Upload” to select a photo from your computer.
- Step 2: Once the image is on the canvas, click the “Effects” icon on the top toolbar (it looks like a magic wand).
- Step 3: Navigate to the “AI” tab within the effects panel. Scroll down to find “AI Motion.”
- Step 4: Select a motion style, such as “Flow,” “Breathe,” or “Zoom.” You can adjust the intensity using the slider.
- Step 5: Click “Apply” and then export the file as an MP4 video or GIF.
How to Swap Clothes Using AI
This is excellent for creating fashion mockups or trying on different looks.
- Step 1: Upload a photo of a person wearing clothes you want to change.
- Step 2: Click the “AI Enhance” button on the top toolbar (or find it under the “Tools” menu).
- Step 3: Look for the “AI Clothes Swap” option. The AI will automatically detect the clothing area.
- Step 4: In the prompt box, describe the new clothing. For example: “Replace with a red leather jacket and black jeans.”
- Step 5: Click “Generate.” The AI will render a new version of the photo with the clothing changed while keeping the person’s pose and face intact.
How to Change a Background Scene
This tool removes the need for manual masking.
- Step 1: Open your image in the editor.
- Step 2: Click on “Remove BG” (Background) in the top toolbar. The AI will instantly cut out the subject.
- Step 3: With the subject selected, click “AI Background.”
- Step 4: Type a new scene description, such as “beach at sunset” or “futuristic city street.”
- Step 5: The AI will generate a new background that blends naturally with the lighting of your subject.
How to Make a Video or Image Anime-Style
This is a fun way to create unique content.
- Step 1: Upload a photo or video clip to the canvas.
- Step 2: Click on “Effects” and then the “AI” tab.
- Step 3: Scroll to find “AI Anime.” There are usually several sub-styles (e.g., “Studio Ghibli,” “Shonen,” “Manga”).
- Step 4: Select your preferred style and click “Apply.” For videos, the AI will process each frame, which may take a few minutes.
Tips for Getting the Most Out of Picsart
To truly master this platform, you need to go beyond the basic clicks. Here are practical tips that will improve your results and save you time.
1. Master the Art of the Prompt
AI image generation is only as good as your description. Be specific. Instead of saying “a dog,” say “a golden retriever puppy sitting on a mossy rock in a forest, morning light, shallow depth of field.” Include style keywords like “cinematic,” “minimalist,” or “vaporwave” to guide the AI. If you are not getting good results, try adding negative prompts (e.g., “no blur, no text”).
2. Use Layers for Non-Destructive Editing
When editing manually, always use the “Layer” system. If you add text or stickers on a new layer, you can move, resize, or delete them later without affecting the original image. This is a fundamental design principle that Picsart supports well.
3. Leverage Templates for Consistency
If you are creating content for a brand, find a template you like and customize it. Then, use “Picsart Flow” to save that design as a “Flow” recipe. You can then apply the same fonts, colors, and layout to new images instantly, ensuring your feed looks cohesive.
4. Experiment with AI Model Selection
Don’t just use the default AI model. Each of the 30+ models has a unique “personality.” For example, the “Stable Diffusion” model is great for creative freedom, while the “Picsart HD” model is better for photorealistic product shots. Spend time testing different models with the same prompt to see which one matches your vision.
5. Use the “Upscale” Feature for Print Quality
AI-generated images can sometimes be low resolution. Before exporting, look for the “Upscale” or “Enhance” button in the export menu. This doubles or quadruples the resolution without losing detail, making the image suitable for printing or large displays.
6. Keyboard Shortcuts Save Time
Learn a few basic shortcuts to speed up your workflow. Ctrl+Z (undo), Ctrl+C (copy layer), and Ctrl+V (paste layer) work universally. Pressing V activates the move tool, and B activates the brush tool.
7. Start with the Free Tier
Before committing to a paid plan, explore the free tools thoroughly. You can generate images, use many effects, and access thousands of free templates. The paid subscription (called “Picsart Gold”) unlocks premium AI models, removes watermarks, and provides access to exclusive assets, but the free version is powerful enough for most beginners.
Conclusion
Picsart has democratized digital creativity. By combining traditional design tools with over 30 specialized AI models, it allows anyone—regardless of skill level—to produce professional-grade images, animations, and videos. Whether you are generating a fantasy landscape from scratch, animating a family photo, or quickly swapping a product’s background, the platform handles the heavy lifting.
The key to success with Picsart is experimentation. Do not be afraid to try different AI models, combine effects, or use the “Flow” feature to automate repetitive tasks. As you become more comfortable with the interface, you will discover that the only limit is your imagination. Start with a simple project today, and you will be amazed at how quickly you can bring your ideas to life.

Picsart: AI Creative Platform
All-in-one creative platform with free AI design tools.