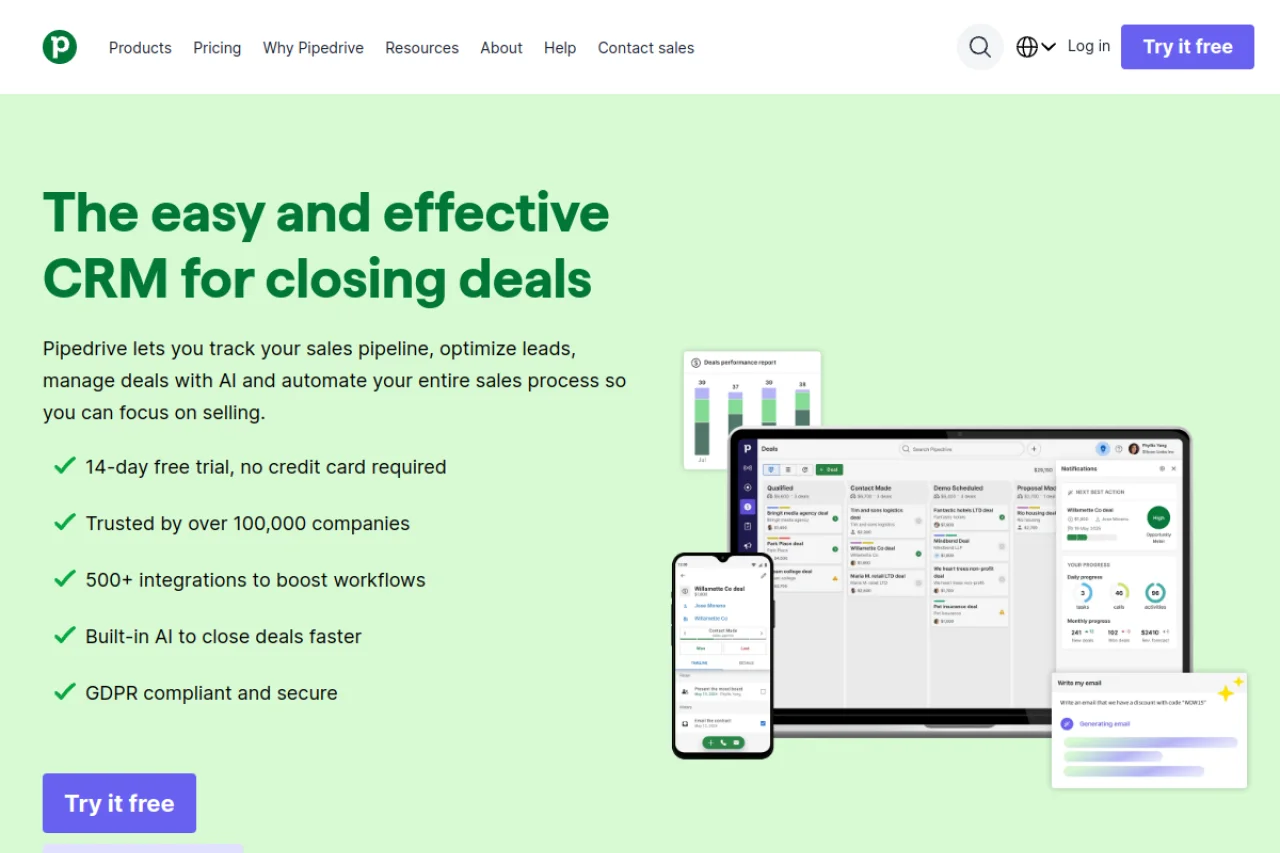
Introduction to Pipedrive: Your Central Sales Command Center
In the fast-paced world of sales, keeping track of leads, follow-ups, and deal stages can quickly become overwhelming. Spreadsheets get messy, emails get lost, and opportunities slip through the cracks. This is where Pipedrive steps in as a dedicated sales CRM (Customer Relationship Management) and pipeline management tool built specifically for small to medium-sized businesses.
Unlike generic project management tools, Pipedrive is designed with one primary goal: to help you close more deals. It provides a visual, activity-based approach to sales, meaning you focus not just on who your leads are, but on what actions you need to take to move them forward. With features ranging from automated workflow triggers to real-time performance dashboards, Pipedrive consolidates your entire sales process into a single, unified platform.
This tutorial will guide you from your first login to advanced usage, ensuring you can leverage Pipedrive to streamline your sales activities, automate repetitive tasks, and gain clear visibility into your team’s performance.
Getting Started with Pipedrive
Step 1: Creating Your Account
Navigate to https://pipedrive.com and click the “Get Started” or “Try for Free” button. You will be prompted to enter your email address, create a password, and provide some basic information about your company, such as your name and the number of users. Pipedrive offers a generous free trial, allowing you to explore the full feature set before committing to a paid plan.
Step 2: The Initial Setup Wizard
Upon your first login, Pipedrive will guide you through a brief onboarding wizard. This is not a step to skip. The wizard will ask you to:
- Define your sales stages: Common stages include “Initial Contact,” “Demo Scheduled,” “Proposal Sent,” and “Closed Won.” You can customize these to match your exact sales process.
- Import your existing data: You can upload a CSV file containing your current leads and contacts. Pipedrive’s import tool will map your columns (e.g., Name, Email, Company) to the correct fields in the CRM.
- Connect your email: Linking your email account (Gmail, Outlook, etc.) is crucial. This enables you to log emails directly to deals and contacts without leaving Pipedrive.
Step 3: Understanding the Dashboard
After setup, you will land on your main dashboard. The left-hand sidebar is your primary navigation hub. Key sections include:
- Dashboard: Your home screen showing key metrics and charts.
- Deals: The core of the tool—your sales pipeline.
- Contacts: All people and companies you interact with.
- Activities: A calendar and list of your scheduled tasks and calls.
- Reports: Pre-built and custom reports on your sales performance.
Key Features of Pipedrive
Lead and Deal Management
Every sales opportunity in Pipedrive is called a Deal. Each deal is associated with a contact, a monetary value, and a specific stage in your pipeline. You can add custom fields (e.g., “Type of Product,” “Competitor Involved”) to capture exactly the data you need. Leads can be manually entered, imported, or automatically captured via web forms integrated with your website.
Sales Pipeline Visualization
This is Pipedrive’s signature feature. The pipeline view displays your deals as horizontal cards that you can drag and drop from one stage to the next. This visual representation makes it instantly clear where your bottlenecks are. For example, if you see 20 deals stuck in the “Proposal Sent” stage, you know you need to focus on follow-up calls.
Workflow Automation
Automation in Pipedrive is handled through Workflow Automator. You can create “if this, then that” rules without any coding. For example, you can set up a rule that automatically sends a thank-you email when a deal moves to the “Closed Won” stage, or creates a follow-up task when a deal remains inactive for three days. This eliminates manual, repetitive tasks.
Email and Calendar Sync
By connecting your email, you can send and receive emails directly from within Pipedrive. Every email you send or receive related to a deal is automatically attached to that deal’s timeline. The calendar sync ensures that your meetings and calls scheduled in Pipedrive appear in your Google or Outlook calendar, and vice versa.
Real-Time Reports and Dashboards
Pipedrive provides a suite of reporting tools that update in real time. You can view dashboards that show your total revenue forecast, the number of deals closed per month, and the average time it takes to move a deal from one stage to another. These insights allow you to refine your sales strategy based on data, not guesswork.
Team Collaboration with Granular Permissions
For teams, Pipedrive allows you to set user permissions at a very detailed level. You can decide who can view, edit, or delete deals, contacts, and reports. For example, a junior sales rep might only see their own deals, while a manager can see the entire team’s pipeline. This ensures data security while promoting transparency where needed.
Marketplace Integrations
Pipedrive integrates with hundreds of third-party tools via its Marketplace. This includes popular apps like Slack for notifications, Mailchimp for email marketing, Zoom for video calls, and QuickBooks for accounting. These integrations allow you to create a seamless workflow without switching between multiple applications.
How to Use Pipedrive: A Step-by-Step Guide
1. Adding Your First Deal
Click the “+ Add Deal” button in the top right corner. A pop-up window will appear. Fill in the following fields:
- Title: A descriptive name, e.g., “Acme Corp – Software Package.”
- Value: The expected revenue from this deal.
- Pipeline and Stage: Select the correct pipeline (you can have multiple pipelines for different products) and the current stage.
- Contact/Person: Search for an existing contact or create a new one.
- Expected Close Date: Your best estimate for when the deal will close.
Click “Save.” Your deal now appears in the pipeline view.
2. Moving a Deal Through the Pipeline
In the pipeline view, simply click and hold the deal card, then drag it to the next stage column. For example, drag it from “Demo Scheduled” to “Proposal Sent.” Pipedrive will log this action in the deal’s history. You can also right-click the card to quickly edit details or add an activity.
3. Logging Activities and Tasks
Click on any deal to open its detail view. In the “Activities” tab, click “+ Add Activity.” You can schedule a call, a meeting, a task (like “Send follow-up email”), or a lunch. Set a due date and assign it to yourself or a teammate. When you complete the activity, check it off. This creates a clear audit trail of every interaction.
4. Setting Up a Workflow Automation
Go to the “Automation” section in the main menu. Click “Create Workflow.” Choose a trigger, such as “When a deal stage changes.” Then define the condition (e.g., “Stage changes to Closed Won”). Finally, set the action (e.g., “Send email to contact” or “Create a task for the owner”). Test your workflow with a sample deal to ensure it works correctly.
5. Generating a Report
Navigate to the “Reports” tab. You will see pre-built reports like “Revenue Forecast” and “Activity Summary.” To create a custom report, click “+ New Report.” Choose the data source (e.g., Deals) and the metric (e.g., Sum of deal value). Then, filter by date range or stage. You can save this report to your dashboard for quick access.
6. Collaborating with Your Team
Within a deal, you can use the “Notes” section to leave comments that are visible to your team. Use the “@mention” feature (typing @ followed by a teammate’s name) to notify them directly. For sharing deals, you can change the owner of a deal from the deal detail page, which reassigns all related activities and tasks.
Tips for Getting the Most Out of Pipedrive
Tip 1: Keep Your Pipeline Stages Realistic
A common mistake is having too many stages or stages that don’t reflect your actual sales process. Keep it simple. Most small businesses do well with 4 to 6 stages. If you find that deals are skipping stages, merge or remove the unused ones. A clean pipeline is an accurate pipeline.
Tip 2: Use Activity-Based Selling
Pipedrive is built around the philosophy that sales are driven by actions, not just status. For every deal, schedule at least one activity per week. This could be a phone call, a research task, or a follow-up email. If a deal has no recent activity, it is likely stalled. Use the “Activities” dashboard to see which deals are being neglected.
Tip 3: Leverage Email Templates
Instead of typing the same introductory email or follow-up message repeatedly, create email templates in Pipedrive. Go to “Settings” > “Email Templates” and write your most common messages. When composing an email from within a deal, you can select a template and insert personalized fields like {contact.name} automatically.
Tip 4: Don’t Ignore the “Lost” Stage
Many users delete deals that are lost. Instead, create a “Lost” stage at the end of your pipeline. Move lost deals there and add a note explaining why the deal fell through. Over time, this data becomes invaluable—you might discover that you lose most deals due to pricing or lack of a specific feature. This insight lets you adjust your strategy.
Tip 5: Review Your Dashboard Daily
Spend five minutes each morning looking at your Pipedrive dashboard. Check the “Deals to Close This Week” widget and the “Overdue Activities” list. This quick review ensures you are prioritizing the most urgent tasks and not missing any critical follow-ups.
Tip 6: Integrate Gradually
While Pipedrive offers hundreds of integrations, avoid connecting everything at once. Start with the essentials: your email, your calendar, and perhaps a Slack channel for deal notifications. Add more integrations (like marketing automation or accounting tools) only after you are comfortable with the core workflow. This prevents confusion and data overload.
Tip 7: Train Your Team on Permissions
If you manage a team, take the time to set up user permissions correctly from the start. Use the “Groups” feature to create roles (e.g., Sales Rep, Sales Manager, Admin). This prevents accidental deletion of important deals and ensures that confidential data (like profit margins) is only visible to those who need it.
Conclusion
Pipedrive is more than just a digital address book; it is a proactive sales engine that helps you visualize, track, and accelerate your deals. By following this tutorial, you have learned how to set up your account, manage your pipeline, automate routine tasks, and leverage real-time data to make informed decisions.
The key to success with Pipedrive is consistency. Regularly update your deals, log your activities, and review your reports. As you become more comfortable, explore the Marketplace to connect tools that further enhance your workflow. With Pipedrive as your central sales command center, you will spend less time on administrative work and more time doing what matters most: closing deals and growing your business.

Pipedrive Sales CRM & Pipeline Management
Sales pipeline CRM for small businesses to manage leads and close deals.