Introduction
For decades, developers have relied on the same basic terminal emulators. While powerful, traditional terminals like iTerm2, GNOME Terminal, or the Windows Command Prompt often feel like relics from a bygone era. They lack modern conveniences such as intelligent autocomplete, natural language processing, and seamless collaboration. This is where Warp changes everything.
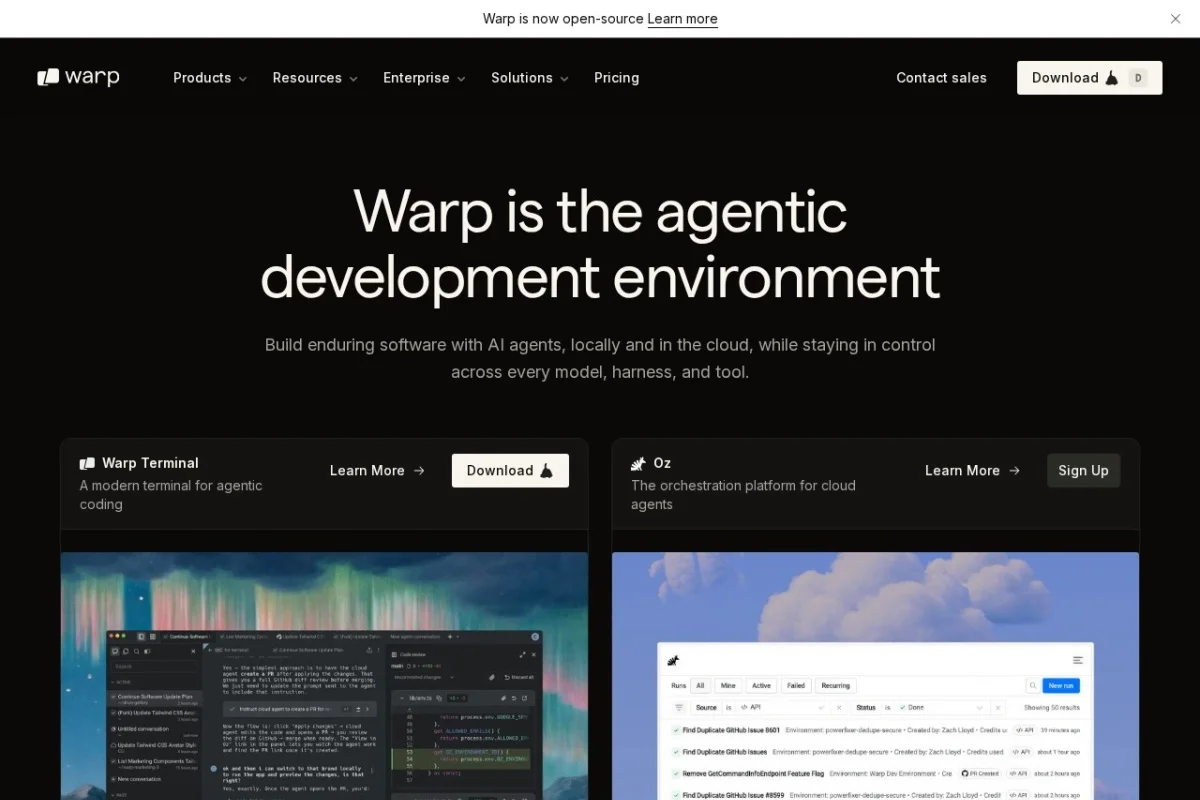
Warp is a modern, GPU-accelerated terminal and development environment built from the ground up for the 21st-century developer. It combines the raw speed of a hardware-accelerated terminal with a suite of built-in AI features designed to make you faster, smarter, and more productive. Instead of memorizing obscure flags or digging through man pages, you can simply ask Warp to do what you need. Whether you are running a local server, debugging a complex pipeline, or managing cloud infrastructure, Warp acts as an intelligent agent that understands your intent.
This tutorial will guide you through everything you need to know to get started with Warp, from installation to mastering its most powerful AI-driven features. By the end, you will understand why thousands of developers are replacing their old terminals with this revolutionary tool.
Getting Started
Installation
Warp is currently available for macOS and Linux. You can download the latest version from the official website at https://www.warp.dev/.
- macOS: Download the .dmg file and drag the Warp application into your Applications folder. Alternatively, you can install it via Homebrew with the command:
brew install --cask warp. - Linux: Warp offers a .deb package for Debian/Ubuntu systems and an .rpm package for Fedora/RHEL systems. You can also use the provided shell script for installation. Detailed instructions are available on the Warp website.
First Launch and Configuration
After installation, launch Warp. You will be greeted with a clean, modern interface. The first time you open it, Warp will ask you to sign in using a GitHub, Google, or email account. This is required to access the AI features and cloud-based configuration sync. Do not worry—your terminal history and sensitive data remain local and private.
Once signed in, you can customize your experience:
- Theme: Navigate to Settings > Themes. Warp offers a variety of built-in themes (Dracula, Nord, Solarized, etc.) and allows you to create custom color schemes.
- Font: Under Settings > Appearance, you can change the font family, size, and line height. Warp supports ligatures for popular coding fonts like Fira Code.
- Key Bindings: If you are coming from another terminal, you can remap keys under Settings > Key Bindings to match your muscle memory.
Understanding the Interface
Warp’s interface is divided into three main areas:
- The Editor: The central area where you type commands and see output. Unlike traditional terminals, Warp treats each command as a distinct block. You can edit, re-run, or delete individual command blocks.
- The Command Palette: Accessible via Cmd+P (macOS) or Ctrl+P (Linux). This is your gateway to all Warp features, including AI commands, settings, and workflows.
- The Sidebar: Located on the left, this shows your open sessions, saved workflows, and AI chat history.
Key Features
1. AI-Powered Command Suggestions and Autocomplete
Warp’s AI is not just a chatbot; it is deeply integrated into the terminal itself. As you type, Warp analyzes the context of your current session and suggests commands. This goes far beyond simple shell history matching. For example, if you have just run cd my-project and then type git, Warp might suggest git status or git log --oneline based on common workflows in that directory.
To use this feature, simply start typing a command. A small popup will appear showing the top suggestions. Press Tab to accept the first suggestion, or use the arrow keys to select a different one. You can also press Ctrl+Space to force open the suggestion menu at any time.
2. Natural Language to Command Conversion
This is perhaps Warp’s most powerful feature. Forget trying to remember the exact syntax for a complex find command or a multi-stage docker build. You can simply describe what you want in plain English.
To access this, open the Command Palette (Cmd+P) and type “Ask AI”. Alternatively, you can use the shortcut Cmd+I (macOS) or Ctrl+I (Linux). A text input box will appear at the top of the terminal. Type your request in natural language, such as:
- “Find all .log files modified in the last 7 days”
- “Kill the process running on port 3000”
- “Create a new branch called feature-x and switch to it”
Warp’s AI will generate the appropriate command. You can then review it, edit it if necessary, and press Enter to execute it directly. This feature dramatically reduces the time spent Googling syntax.
3. GPU-Accelerated Terminal Performance
Warp is not just a wrapper around a standard terminal emulator. It uses your computer’s GPU (Graphics Processing Unit) to render text and handle scrolling. This results in buttery-smooth performance even when dealing with massive log files, thousands of lines of output, or rapid real-time data streams. You will notice the difference immediately when running tail -f on a busy log file or when using tools like htop with frequent updates.
4. Built-in AI Agent for Debugging and Workflows
When a command fails, Warp does not just leave you staring at an error message. The built-in AI agent can analyze the error and suggest fixes. After a command fails, you will see a small “Explain Error” button appear next to the output. Click it, and Warp will provide a plain-English explanation of what went wrong and offer a corrected command.
For more complex debugging, you can open the AI chat panel (Cmd+Shift+I) and ask questions about your entire session. For example, you could ask: “Why did my deployment script fail after the npm install step?” The AI has context of your previous commands and can provide a detailed analysis.
5. Collaborative Features for Team Workflows
Warp includes features designed for teams. You can share your terminal sessions with colleagues, create reusable “Workflows” (saved sequences of commands), and even share AI-generated command blocks. This is invaluable for onboarding new team members or standardizing deployment procedures.
- Workflows: Found in the sidebar, these are saved sequences of commands that can be run with a single click. You can create a workflow for setting up a development environment, deploying to production, or running database migrations.
- Session Sharing: You can generate a shareable link for your current terminal session. Anyone with the link can view your commands and output in real-time, making pair debugging much easier.
How to Use
Basic Terminal Operations
Warp functions like any other terminal for basic operations. You can run ls, cd, mkdir, and all your familiar shell commands. However, there are some improvements:
- Command Blocks: Each command you run is displayed in a separate block. You can click on any previous block to select it, then press Enter to re-run it, or press Backspace to delete it. This makes it easy to clean up your terminal history.
- Output Navigation: You can scroll through the output of a single command block without moving the entire terminal window. This is especially useful for long outputs like build logs.
- Split Panes: You can split your terminal into multiple panes by clicking the “+” icon in the sidebar or using Cmd+D. Each pane runs independently, allowing you to monitor multiple processes simultaneously.
Using AI for Command Generation
Let us walk through a practical example. Imagine you need to find all JavaScript files in your project that contain the word “deprecated”. Instead of typing grep -r "deprecated" --include="*.js" ., you can:
- Press Cmd+I to open the AI input.
- Type: “Find all JS files containing the word deprecated”
- Press Enter.
- Warp will display the generated command:
grep -r "deprecated" --include="*.js" . - Review the command. If it looks correct, press Enter again to execute it.
If you are not satisfied with the suggestion, you can refine your query. For instance, you could add: “and ignore node_modules” and Warp will update the command to include the --exclude-dir=node_modules flag.
Debugging with the AI Agent
Suppose you run a Python script and get a ModuleNotFoundError. Instead of manually checking your Python path or requirements file, do this:
- Wait for the error to appear in the output.
- Click the “Explain Error” button that appears next to the error block.
- Warp will analyze the error and display a panel explaining that the module is not installed, along with a suggested command like
pip install missing-module. - You can click the suggested command to automatically insert it into the terminal and run it.
Creating and Using Workflows
Workflows are perfect for repetitive tasks. To create one:
- Run a series of commands manually in the terminal.
- Select all the command blocks you want to save (hold Shift and click).
- Right-click and choose “Save as Workflow”.
- Give your workflow a name and description (e.g., “Setup Dev Environment”).
- To run the workflow later, open the Workflows panel in the sidebar and click the play button next to your saved workflow.
Tips
Master the Keyboard Shortcuts
Warp is designed to be used without a mouse. Memorize these essential shortcuts:
- Cmd+I: Open AI command input.
- Cmd+Shift+I: Open AI chat panel.
- Cmd+P: Open Command Palette.
- Cmd+D: Split pane vertically.
- Cmd+Shift+D: Split pane horizontally.
- Cmd+W: Close current pane.
- Ctrl+Tab: Switch between open sessions.
Leverage Context for Better AI Responses
The AI is context-aware. If you are in a directory containing a package.json file, the AI will prioritize Node.js-related suggestions. To get the best results, ensure you are in the correct working directory before asking a question. For example, before asking “How do I run the tests?”, navigate to the project root first.
Use the Command Palette for Everything
Instead of digging through menus, use the Command Palette (Cmd+P). You can quickly access settings, themes, workflows, AI features, and even run system commands like “Open Preferences” or “Toggle Full Screen”.
Customize Your AI Prompts
Warp allows you to fine-tune how the AI behaves. Go to Settings > AI. You can add custom instructions that the AI will always consider. For example, you could add: “Always use long flags (e.g., –help instead of -h) for clarity” or “Prefer using zsh syntax.” This ensures the generated commands match your team’s coding standards.
Keep Your Workflows Organized
As you create more workflows, use descriptive names and add tags. You can also share workflows with your team by exporting them as JSON files. To export a workflow, right-click it in the sidebar and select “Export.” Your teammates can then import it by dragging the file into their own Warp sidebar.
Use the Built-in SSH Manager
Warp includes a built-in SSH manager. Go to Settings > SSH to add your server connections. Once configured, you can connect to any server with a single click from the sidebar, and Warp will handle key management and authentication for you.
Regularly Update Warp
The Warp team releases updates frequently, adding new AI features and performance improvements. Warp will notify you when an update is available. You can also check for updates manually via Warp > Check for Updates on macOS, or via the package manager you used for installation on Linux.
Conclusion
Warp is not just a terminal; it is a complete rethinking of how developers interact with their command line. By combining GPU-accelerated performance with deep AI integration, it eliminates the friction of traditional terminal work. Whether you are a seasoned DevOps engineer or a beginner just learning the command line, Warp’s natural language interface, intelligent suggestions, and collaborative features will make you more productive from day one.
Start by installing Warp, explore the AI features by asking a simple question, and gradually incorporate workflows and session sharing into your daily routine. Once you experience the speed and intelligence of Warp, you will wonder how you ever managed without it.