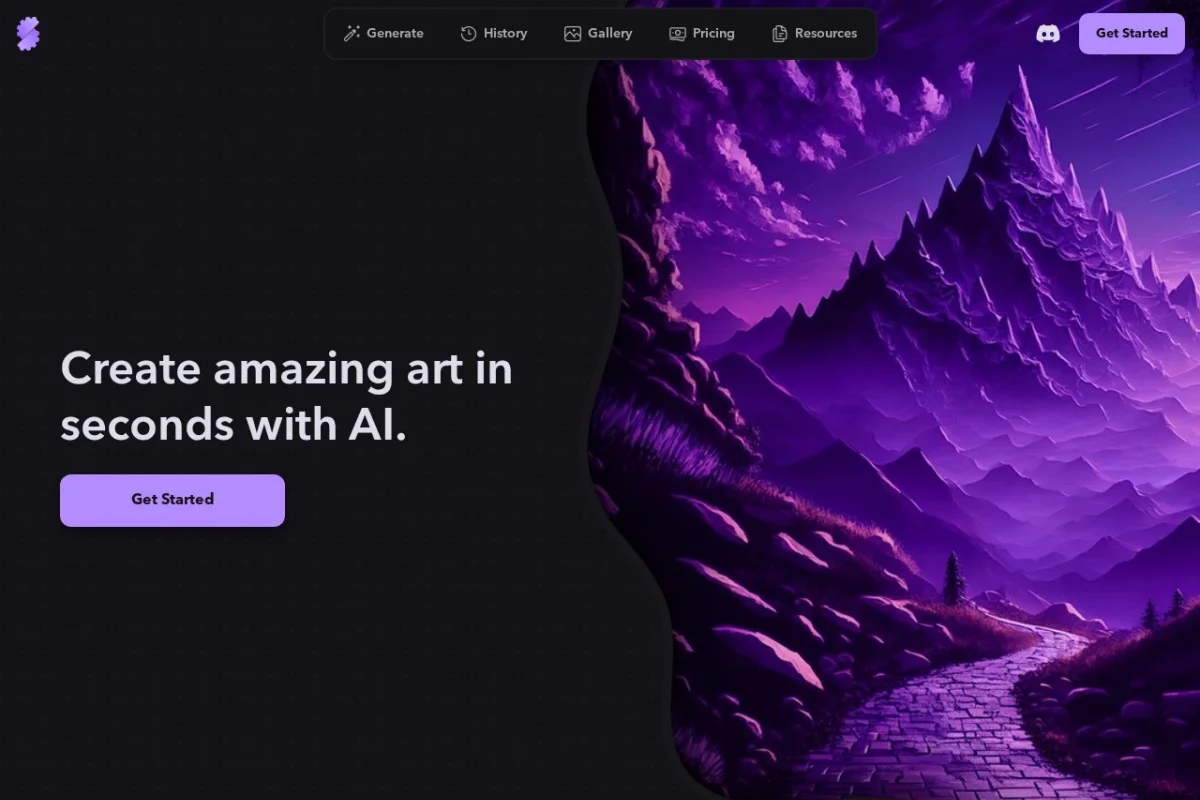
Introduction to Stablecog
In the rapidly evolving world of artificial intelligence, image generation has become one of the most exciting and accessible creative tools available. Among the many platforms that have emerged, Stablecog stands out as a powerful yet remarkably simple solution. Stablecog is a free, open-source AI image generation platform that harnesses the capabilities of stable diffusion models to transform your text descriptions into stunning visual artwork. Whether you are a professional designer seeking inspiration, a hobbyist exploring digital art, or a complete beginner with no technical background, Stablecog provides a straightforward path to creating high-quality images, photos, and illustrations.
What makes Stablecog particularly appealing is its commitment to accessibility. Unlike many AI tools that require complex setup, subscription fees, or powerful hardware, Stablecog operates entirely through a web browser. You do not need to install any software, understand machine learning concepts, or even create an account to start generating images. This tutorial will guide you through every aspect of Stablecog, from your first prompt to advanced tips for getting the best results. By the end, you will be equipped with the knowledge to create impressive AI-generated art with confidence and ease.
Getting Started with Stablecog
Accessing the Platform
Getting started with Stablecog is as simple as visiting the website. Open your preferred web browser and navigate to https://stablecog.com/. The platform is fully web-based, meaning it works on any device with an internet connection, including desktop computers, laptops, tablets, and even smartphones. There is no registration process required for basic use, so you can begin creating immediately.
Understanding the Interface
When you first arrive at Stablecog, you will be greeted by a clean, minimalist interface designed with the user in mind. The layout consists of three main areas:
- The Prompt Input Box: This is the central text field where you will type your description of the image you want to generate. It is prominently placed and easy to locate.
- The Generate Button: Located near the prompt input, this button initiates the image creation process. It is clearly labeled and often features a distinctive color or icon.
- The Image Display Area: Once you generate an image, it will appear in this central section. Here you can view, download, or refine your creation.
The absence of cluttered menus or confusing technical options is intentional. Stablecog prioritizes simplicity, allowing you to focus entirely on your creative vision rather than navigating complex settings.
No Account, No Problem
One of the most user-friendly aspects of Stablecog is that you do not need to create an account for basic usage. This eliminates barriers such as password creation, email verification, or data sharing concerns. You can simply open the website and start generating images immediately. However, if you choose to create a free account at a later stage, you may gain access to additional features such as saving your generation history or accessing higher-resolution outputs. For most beginners, the no-account option is perfectly sufficient to explore the tool’s capabilities.
Key Features of Stablecog
Free and Open-Source AI Image Generation
Stablecog is completely free to use, which is a significant advantage over many competing platforms that impose credit systems, subscription fees, or usage limits. Being open-source means that the underlying code is transparent and continuously improved by a community of developers. This ensures that the tool remains cutting-edge and trustworthy, as anyone can inspect how it works.
Text-to-Image Generation Using Stable Diffusion
At the heart of Stablecog is a powerful technology called stable diffusion. This is a type of generative AI model that has been trained on millions of images and their corresponding text descriptions. When you provide a text prompt, the model interprets your words and generates a new image that matches your description. The results can range from photorealistic scenes to abstract art, depending on how you craft your prompt. Stable diffusion models are known for their ability to produce coherent, detailed, and aesthetically pleasing images.
Simple and Intuitive User Interface
Stablecog’s design philosophy revolves around removing complexity. There are no sliders for obscure parameters, no dropdown menus filled with technical jargon, and no confusing workflows. The interface is intentionally sparse, guiding you naturally from prompt to image. This makes it an ideal starting point for anyone who feels intimidated by more advanced AI tools.
No Account Required for Basic Use
As mentioned earlier, you can use Stablecog without any registration. This lowers the entry barrier to virtually zero. You can experiment with different prompts, generate multiple images, and even download your favorites without ever providing personal information. This feature is particularly valuable for educators, students, or casual users who want to quickly test the capabilities of AI image generation.
Fast Image Generation
Stablecog is optimized for speed. While the exact generation time depends on server load and the complexity of your prompt, most images are produced within seconds. This rapid feedback loop encourages experimentation. You can try a prompt, see the result, tweak your description, and generate a new version almost instantly. This iterative process is key to mastering the tool and achieving the images you envision.
How to Use Stablecog: A Step-by-Step Guide
Step 1: Crafting Your First Prompt
The most important skill in using Stablecog is writing effective prompts. A prompt is simply a text description of the image you want to create. The more detailed and specific your prompt, the better the AI will understand your intent. For example, instead of writing “a cat,” try “a fluffy orange tabby cat sitting on a windowsill, soft morning light, realistic style.” This provides the model with context, subject, lighting, and artistic direction.
Here are some elements you can include in your prompts:
- Subject: What is the main focus? (e.g., a person, an animal, a landscape, an object)
- Action: What is happening? (e.g., running, sleeping, flying, cooking)
- Environment: Where is the scene set? (e.g., a forest, a city street, under water, in space)
- Lighting and Mood: What is the atmosphere? (e.g., dramatic shadows, golden hour, neon lights, foggy)
- Art Style: What visual style do you prefer? (e.g., oil painting, pencil sketch, 3D render, anime, photorealistic)
- Colors: Are there specific colors you want to emphasize? (e.g., monochrome blue, vibrant rainbow, pastel tones)
Example prompts for beginners:
- “A serene mountain lake at sunrise, reflection of snow-capped peaks, cinematic composition, realistic.”
- “A cyberpunk city street at night, rain-slicked pavement, neon signs, futuristic cars, detailed digital art.”
- “A cute cartoon panda eating bamboo, simple background, bright colors, children’s book illustration style.”
Step 2: Entering Your Prompt
Click on the prompt input box on the Stablecog homepage. Type or paste your prompt into this field. You can write in natural language, just as you would describe a scene to another person. There is no need for special syntax or formatting. Once you are satisfied with your description, proceed to the next step.
Step 3: Generating the Image
Locate the “Generate” button, which is typically positioned next to or below the prompt input box. Click this button to start the image generation process. You will notice a brief loading indicator or progress bar, indicating that the AI is working on your request. In most cases, this takes only a few seconds.
Step 4: Viewing and Downloading Your Result
Once the generation is complete, your image will appear in the display area. You can view it in full detail directly on the page. Below or beside the image, you will usually find options to download it to your device. Click the download button to save the image in a standard format such as PNG or JPEG. You can now use this image for personal projects, social media, or further editing in other software.
Step 5: Refining and Iterating
Rarely will the first image be exactly what you imagined. This is normal and part of the creative process. To refine your result, modify your prompt and generate again. You might add more detail, change the style, or adjust the mood. For example, if your first image of a “mountain lake” was too dark, you could change the prompt to “bright sunny day at a mountain lake, clear blue water, vibrant green trees.” Each iteration brings you closer to your vision.
Tips for Getting the Best Results with Stablecog
Be Specific and Descriptive
The AI interprets your words literally. Vague prompts produce vague results. Instead of “a beautiful landscape,” try “a rolling hillside covered in lavender fields, a small stone cottage in the distance, late afternoon sunlight, impressionist painting style.” Specificity gives the model clear guidance and dramatically improves output quality.
Use Artistic and Technical Keywords
Including keywords related to art techniques, camera settings, or visual effects can significantly influence the outcome. For example:
- Art styles: “oil painting,” “watercolor,” “pencil sketch,” “digital art,” “anime,” “cyberpunk,” “steampunk.”
- Photography terms: “cinematic lighting,” “shallow depth of field,” “macro shot,” “wide angle lens,” “long exposure.”
- Mood and atmosphere: “mysterious,” “serene,” “dramatic,” “whimsical,” “dark and gritty.”
- Quality descriptors: “highly detailed,” “intricate,” “sharp focus,” “8K resolution,” “award-winning.”
Experiment with Negative Prompts
While Stablecog’s basic interface focuses on positive prompts, many advanced users achieve better results by mentally noting what they do not want. If you find that your images consistently include unwanted elements (e.g., blurry backgrounds, extra limbs, or certain colors), adjust your prompt to exclude these. For instance, if a “portrait of a woman” keeps generating multiple people, try “portrait of a single woman, no other people.”
Start Simple, Then Add Complexity
If you are new to AI image generation, begin with short, simple prompts. Once you understand how the model responds, gradually add more elements. This approach helps you learn which words have the most impact. A good starting prompt might be “red apple on a table.” After seeing the result, you could expand it to “shiny red apple on a wooden table, soft natural light from a window, photorealistic.”
Use Descriptive Language for Composition
You can guide the AI’s composition by describing the arrangement of elements. Words like “foreground,” “background,” “centered,” “symmetrical,” “close-up,” or “wide shot” help the model understand spatial relationships. For example, “a close-up of a flower with a blurred green background” will produce a very different result than “a wide shot of a field of flowers with mountains in the background.”
Explore Different Genres and Themes
Do not limit yourself to one type of image. Stablecog can generate fantasy landscapes, realistic portraits, abstract patterns, futuristic architecture, historical scenes, and much more. Experimenting across genres will expand your understanding of the tool’s capabilities and inspire new creative ideas. Try prompts like “a futuristic city floating in the clouds,” “a Victorian-era detective in a foggy London street,” or “a surreal dreamscape with floating clocks.”
Save and Compare Your Work
As you generate multiple images, save the ones you like. Over time, you will build a personal gallery that shows your progress. Comparing your earlier attempts with later ones helps you identify which prompt strategies work best. You may also notice patterns in the AI’s behavior that you can leverage for future projects.
Be Patient and Persistent
AI image generation is not always perfect on the first try. Some prompts may produce unexpected or even bizarre results. This is part of the learning curve. Instead of getting discouraged, view each result as a data point. Ask yourself: What worked? What did not? How can I rephrase my prompt? With practice, you will develop an intuition for how Stablecog interprets language, and your images will steadily improve.
Conclusion
Stablecog democratizes AI image generation by making it free, fast, and incredibly easy to use. Whether you are creating art for fun, designing visuals for a project, or simply exploring the capabilities of artificial intelligence, this platform offers a welcoming entry point. By understanding how to craft effective prompts, leveraging the tool’s simple interface, and applying the tips outlined in this tutorial, you can produce impressive, high-quality images without any prior technical knowledge. Visit https://stablecog.com/ today and start bringing your imagination to life, one prompt at a time.
