Introduction
In today’s fast-paced world, staying organized is no longer a luxury—it’s a necessity. Whether you are managing a complex work project, planning a family vacation, or simply trying to remember to buy groceries, the sheer volume of tasks can quickly become overwhelming. This is where Todoist steps in. As one of the most popular task management applications available, Todoist serves as a digital command center for your life. It is designed to help individuals and teams capture ideas, organize work, and collaborate effectively.
Todoist is more than just a digital to-do list. It is a powerful productivity engine that allows you to break down large goals into manageable steps, set priorities, and track your progress over time. Available on virtually every platform—including Windows, macOS, iOS, Android, and web browsers—it ensures that your tasks are always with you. With features like projects, labels, filters, and the gamified “Karma” system, Todoist transforms the mundane act of checking off tasks into a rewarding habit. This tutorial will guide you from your first login to advanced task management, ensuring you get the most out of this versatile tool.
Getting Started
Creating Your Account
To begin your journey with Todoist, navigate to https://todoist.com. You can sign up using your Google account, Apple ID, Facebook account, or a dedicated email address. The free plan is surprisingly robust and will be more than sufficient for most individual users. If you decide later that you need more features, such as reminders, labels, or file uploads, you can upgrade to the Pro or Business plans.
Navigating the Interface
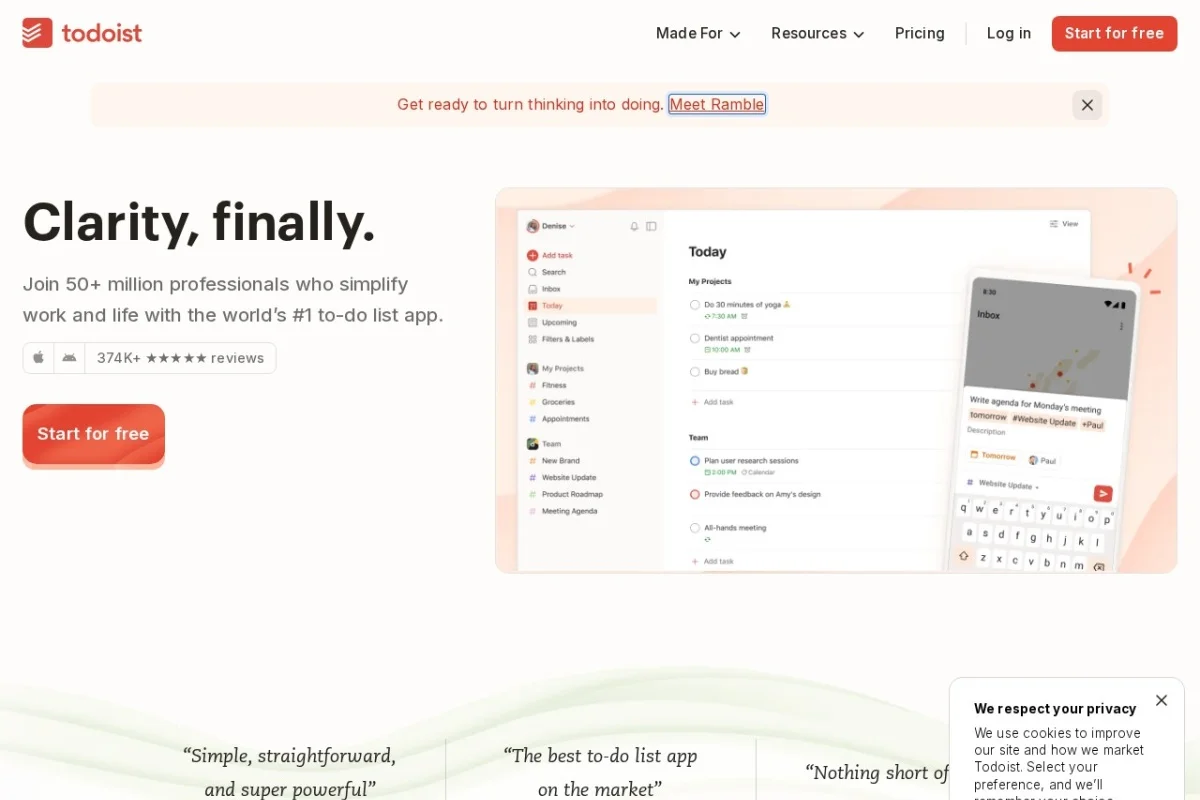
Once you log in, you will see the main interface. On the left-hand side is the sidebar, which contains your projects, labels, and filters. The center of the screen is your task view, where your selected list of tasks appears. At the bottom of the task view is the quick add bar, which is your primary tool for entering new tasks. Familiarizing yourself with these three areas is the first step to mastering Todoist.
Installing the App
While the web version works perfectly, installing the native app on your devices will significantly improve your experience. Go to your device’s app store (Google Play, Apple App Store, or Microsoft Store) and search for “Todoist.” Install the app and log in. The mobile app allows you to add tasks on the go, which is one of the most powerful aspects of the tool.
Key Features
Projects and Sub-Projects
Projects are the top-level containers for your work. You might have a project called “Work,” another called “Home Renovation,” and another called “Reading List.” Within each project, you can create sub-projects or simply organize tasks into sections. For example, within your “Work” project, you might have sub-projects for “Marketing Campaign” and “Quarterly Report.” This hierarchy allows you to keep related tasks together without cluttering your main view.
Tasks and Subtasks
Every item on your list is a task. Tasks can be broken down into subtasks. For example, a task called “Write Blog Post” might have subtasks like “Research Topic,” “Write Draft,” and “Add Images.” This feature is essential for complex tasks that require multiple steps.
Due Dates and Reminders
Setting a due date is crucial for time management. Todoist uses natural language processing, meaning you can type “tomorrow at 3pm” and the system will automatically set the correct date and time. Reminders (available on Pro plans) will notify you via email, push notification, or even SMS, ensuring you never miss a deadline.
Priority Levels
Not all tasks are created equal. Todoist uses a color-coded priority system: P1 (red) for urgent and important tasks, P2 (orange) for important but not urgent, P3 (blue) for tasks that need doing, and P4 (gray) for low-priority items. Using these levels helps you focus on what truly matters each day.
Labels and Filters
Labels are like tags that you can apply to tasks to categorize them across different projects. For example, you might have a label called “@phone” for tasks that require a phone call, or “@errands” for tasks that require leaving the house. Filters allow you to create custom views by combining criteria. For instance, you could create a filter that shows only P1 tasks with the label “@urgent” that are due today.
Todoist Karma
Todoist Karma is a gamification feature that tracks your productivity. You earn points for completing tasks, meeting due dates, and maintaining streaks. As you accumulate points, you level up from “Beginner” to “Enlightened.” This feature provides a fun, visual representation of your progress and can be a great motivator.
Collaboration
Todoist is not just for solo users. You can share projects with other people, assign tasks to them, and comment on tasks. This makes it an excellent tool for team projects, family chore lists, or planning a trip with friends. When you assign a task to someone, they receive a notification, and you can see the status of their work in real-time.
How to Use
Step 1: Creating Your First Project
Click the “+ Add Project” button at the bottom of the sidebar. Name your project something simple, like “Personal Goals.” You can choose a color for the project to make it visually distinct. Once created, click on the project name to open it in the main view.
Step 2: Adding Tasks
Click inside the “Add task” bar at the top of the task view. Type the name of your task. For example, “Read 20 pages of book.” To add a due date, simply type “today” or “next Monday.” To set a priority, type “p1” or “p2.” Press Enter. The task will appear in your list. You can also use the “Quick Add” button (the “+” sign) to add tasks from anywhere in the app.
Step 3: Organizing with Sections
If your project has multiple phases, you can create sections. In an open project, click the three dots (menu) next to the project name and select “Add section.” Name the section “Phase 1.” You can now drag and drop tasks into this section. This is particularly useful for projects like “Planning a Wedding” where you might have sections for “Venue,” “Catering,” and “Guest List.”
Step 4: Using Labels and Filters
First, create a label by clicking the “Labels” option in the sidebar and selecting “Add Label.” Create labels like “@computer” and “@phone.” Now, go back to your task list. Click on a task to open its detail view. Click the “Label” icon (a tag) and select the label you want. To create a filter, click “Filters” in the sidebar and select “Add Filter.” Name it “High Priority Calls.” In the query field, type: p1 & @phone. This filter will now show you all tasks that are priority 1 and require a phone call.
Step 5: Collaborating with Others
To share a project, click the “Share” button (a person icon) at the top of the project view. Enter the email address of the person you want to invite. They will receive an email invitation. Once they accept, they can see the project, add tasks, and mark them as complete. To assign a task, click on the task, then click the “Assign” icon (a person with a “+”) and select the collaborator. They will see the task in their “Upcoming” view.
Step 6: Setting Up Integrations
Todoist integrates with over 60 apps. To connect your calendar, go to Settings > Integrations. Click “Connect to Google Calendar” (or your preferred calendar service). Once connected, tasks with due dates will appear as events on your calendar. You can also integrate with email services like Gmail, allowing you to turn an email directly into a task by forwarding it to your unique Todoist email address (found in your settings).
Step 7: Tracking Your Karma
Your Karma score is displayed at the top of the sidebar. Click on it to view your detailed statistics. You can see how many tasks you completed today, this week, and your current streak. To adjust your Karma settings, click the gear icon next to your Karma score. You can choose to exclude certain projects (like a shared shopping list) from your Karma calculations if you prefer.
Tips
Master Natural Language Input
One of Todoist’s strongest features is its ability to understand natural language. Instead of clicking through date pickers, type phrases like “every weekday at 9am” for a recurring task, or “next Friday @office p2” to set a date, label, and priority all at once. This will dramatically speed up your task entry.
Use the “Today” and “Upcoming” Views
Do not rely solely on your project lists. The “Today” view (found in the sidebar) shows you everything that is due today, regardless of which project it belongs to. The “Upcoming” view shows a calendar of your tasks for the week and month. These views are your best friends for daily planning.
Keep It Simple
A common mistake new users make is creating too many projects and labels. Start with just three or four main projects (e.g., Work, Personal, Household, Goals). Use labels sparingly—only when you need to filter across projects. Overcomplicating your system will lead to burnout. You can always add more structure later.
Use the 2-Minute Rule
If a task will take less than two minutes to complete, do not add it to Todoist. Just do it immediately. This keeps your task list clean and prevents you from spending more time managing tasks than actually doing them.
Review Weekly
Set aside 10 minutes every Sunday evening for a “weekly review.” Go through your projects, check what you have completed, move unfinished tasks to the next week, and delete tasks that are no longer relevant. This habit will keep your system clean and your mind clear.
Leverage Templates
If you find yourself creating the same project structure repeatedly (e.g., a “Trip Planning” project), save it as a template. Click the three dots next to the project name, select “Export as Template”. You can then import this template whenever you start a new trip. The Todoist community also offers hundreds of free templates for everything from job hunting to meal planning.
Keyboard Shortcuts
Learn a few keyboard shortcuts to boost your speed. On the web and desktop apps, press Q to open the Quick Add bar, T to go to the Today view, and Ctrl + K (or Cmd + K on Mac) to open the command palette. These shortcuts will make you feel like a power user in no time.
Don’t Chase Karma
While Todoist Karma is a fun motivator, do not let it dictate your workflow. Adding unnecessary small tasks just to boost your score defeats the purpose of productivity. Use Karma as a gentle nudge, not a performance metric.
By following this tutorial, you now have a solid foundation for using Todoist to manage your tasks and projects. Start simple, build your system gradually, and remember that the ultimate goal is to reduce mental clutter so you can focus on what truly matters. Happy organizing!
