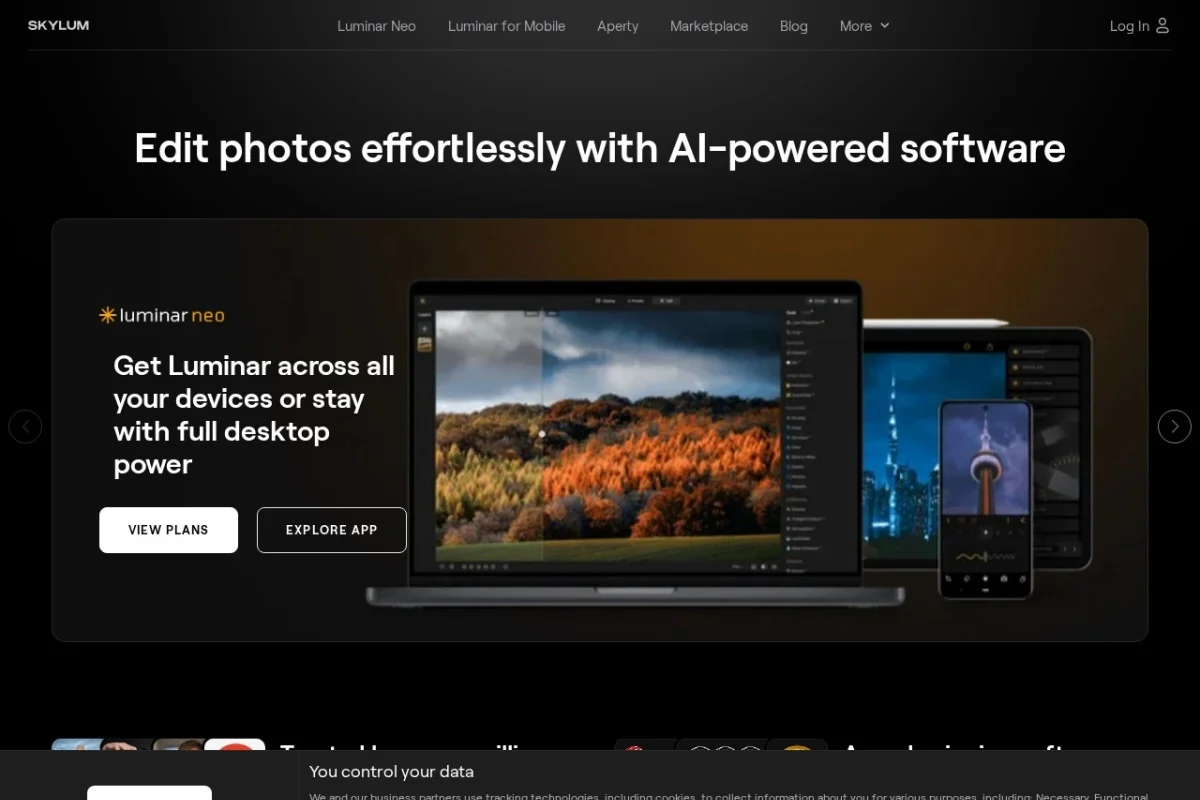
Introduction to Skylum and Luminar
Skylum is a software company that specializes in advanced photo editing and creative imaging tools. Its flagship product, Luminar, is designed for photographers and digital artists who want to combine powerful editing capabilities with artificial intelligence. Unlike traditional photo editors that require manual adjustments for every detail, Luminar uses AI to automate complex tasks such as sky replacement, object removal, and facial retouching. This makes it an excellent choice for both beginners who want quick results and professionals who need efficient workflows.
The software is available for both Windows and macOS, and it integrates with popular platforms like Adobe Lightroom and Photoshop as a plugin. However, it also works perfectly as a standalone application. In this tutorial, you will learn how to install Luminar, navigate its interface, use its key AI-powered features, and apply practical editing techniques to improve your photos.
Getting Started with Skylum Luminar
System Requirements and Installation
Before downloading Luminar, ensure your computer meets the minimum requirements. For Windows, you need Windows 10 or later, at least 8GB of RAM, and a graphics card that supports OpenGL 3.3. For macOS, you need macOS 10.14 or newer. Visit https://skylum.com and click the “Free Trial” or “Buy Now” button to download the installer. Once downloaded, run the setup file and follow the on-screen instructions. The installation process is straightforward and typically takes a few minutes.
Setting Up Your Workspace
When you first open Luminar, you will see a clean interface divided into three main areas: the Media Browser on the left, the Preview Window in the center, and the Edit Panel on the right. The Media Browser allows you to browse folders on your computer and import images. The Preview Window shows your selected photo. The Edit Panel contains all the tools and filters you can apply. To customize your workspace, go to the top menu and select Window > Workspace. You can choose from presets like “Essentials” for beginners or “Pro” for advanced editing.
Importing Your First Photo
Click the “Add Images” button in the Media Browser or drag and drop a photo directly into the Preview Window. Luminar supports common formats like JPEG, PNG, TIFF, and RAW files from most cameras. Once imported, double-click the thumbnail to open the photo in the editing view. The image will appear in the center, and the Edit Panel will become active.
Key Features of Skylum Luminar
AI-Powered Photo Enhancement
Luminar’s AI tools are its standout feature. The AI Accent tool automatically analyzes your image and adjusts exposure, contrast, color, and detail to create a balanced result. The AI Sky Enhancer detects the sky in your photo and enhances its colors and contrast without affecting the foreground. The AI Structure tool intelligently sharpens details in specific areas like textures and edges while avoiding noise amplification. These tools save time and produce professional-looking edits with a single click.
Creative Filters and Effects
Luminar includes a library of creative filters that you can apply to transform your photos. These include Dramatic Black & White, Glow, Orton Effect, and Vintage. Each filter is fully adjustable, so you can control the intensity and blend mode. You can also stack multiple filters on top of each other to create unique looks. The LUT Mapping filter allows you to import custom LUTs (Look-Up Tables) for color grading.
Layer-Based Editing
Luminar supports layer-based editing, which is essential for advanced compositing and retouching. You can add multiple layers, each with its own set of filters and adjustments. Layers can be blended using modes like Multiply, Screen, Overlay, and Soft Light. You can also add Masking to each layer to hide or reveal specific parts of the image. This feature is particularly useful for combining multiple exposures or adding textures.
Sky Replacement and Object Removal
The Sky Replacement tool uses AI to detect the sky in your photo and replace it with a new one from a built-in library or your own image. The tool automatically adjusts the color temperature and lighting to match the new sky. For object removal, the Clone & Stamp tool allows you to paint over unwanted objects. The Eraser tool can remove small distractions like dust spots or power lines. For larger objects, use the Healing Brush which blends the surrounding pixels seamlessly.
Batch Processing Capabilities
If you have a large set of photos that need the same adjustments, Luminar’s batch processing feature is invaluable. You can apply a set of filters and adjustments to one photo, save it as a preset, and then apply that preset to hundreds of images at once. This is ideal for events like weddings or travel photography where lighting conditions are consistent.
How to Use Skylum Luminar: Step-by-Step Guide
Step 1: Basic Adjustments
Open a photo in the editing view. In the Edit Panel, you will see the Essentials tab. Here, you can adjust Exposure, Contrast, Highlights, Shadows, Whites, and Blacks. Use the sliders to brighten or darken your image. For example, if your photo is underexposed, increase the Exposure slider. If the shadows are too dark, increase the Shadows slider. The Clarity slider adds midtone contrast for a crisp look. The Vibrance slider boosts colors without oversaturating skin tones.
Step 2: Using AI Tools
Click on the AI Tools tab in the Edit Panel. You will see options like AI Accent, AI Sky Enhancer, and AI Structure. Start with AI Accent. Click the button, and the software will analyze your image and apply adjustments. If the result is too strong, use the Amount slider to reduce the effect. Next, try AI Sky Enhancer. This tool works best on landscape photos with a visible sky. Adjust the Intensity slider to control how much the sky is enhanced. Finally, use AI Structure to sharpen details. Move the slider to the right to increase texture detail, or to the left to soften the image.
Step 3: Applying Creative Filters
Go to the Creative tab in the Edit Panel. You will see a list of filters. Click on Glow to add a soft, dreamy effect to portraits. Adjust the Glow Amount and Radius sliders to control the effect. For a vintage look, click Vintage and choose a preset like “Old Photo” or “Sepia.” You can also customize the color tint and grain. To add a dramatic black and white effect, click Black & White and adjust the color channels to control how different colors convert to grayscale.
Step 4: Sky Replacement
Click on the Sky Replacement tool in the AI Tools tab. The software will automatically detect the sky in your photo. A selection mask will appear, showing the detected area in red. If the selection is not perfect, use the Refine Edge brush to add or remove areas. Next, choose a new sky from the library. You can browse categories like “Sunset,” “Cloudy,” or “Night.” Once selected, the new sky will appear in your photo. Adjust the Horizon Blur and Relight sliders to make the sky look natural. The Relight slider adjusts the color temperature of the foreground to match the new sky.
Step 5: Object Removal
To remove an unwanted object, use the Clone & Stamp tool. Select it from the toolbar on the left. Hold the Alt key (Windows) or Option key (macOS) and click on a clean area of the photo that you want to use as a source. Then, paint over the object you want to remove. The tool will copy pixels from the source area to cover the object. For more precise removal, use the Healing Brush. It works similarly but blends the source pixels with the surrounding area for a seamless result.
Step 6: Layer-Based Editing
Click on the Layers panel at the bottom of the Edit Panel. Click the + icon to add a new layer. You can choose to add a blank layer, a duplicate of the current layer, or an image from your computer. For example, add a texture image to create a double exposure effect. Select the new layer, then go to the Blending Mode dropdown and choose Screen or Overlay. To mask parts of the layer, click the Mask icon. Use a black brush to hide areas and a white brush to reveal them.
Step 7: Batch Processing
First, edit a single photo to your liking. Then, go to the top menu and select File > Save as Preset. Name your preset and save it. Next, go to the Media Browser and select multiple photos by holding the Ctrl key (Windows) or Command key (macOS) and clicking each thumbnail. Right-click on the selected photos and choose Batch Processing. In the dialog box, select your saved preset from the dropdown menu. Choose an output folder and file format (e.g., JPEG or TIFF). Click Apply, and Luminar will process all selected photos with the same settings.
Tips for Getting the Most Out of Skylum Luminar
Tip 1: Use Presets for Speed
Luminar comes with a wide range of built-in presets. Explore the Presets tab in the Edit Panel. You can apply a preset with one click and then fine-tune it. This is a great way to learn how different adjustments affect your photos. Over time, create your own presets for common scenarios like portraits, landscapes, or black and white conversions.
Tip 2: Master Masking for Precision
Masking is one of the most powerful features in Luminar. When you apply a filter or adjustment, you can use a mask to limit its effect to specific areas. For example, if you want to brighten only the subject’s face, apply an exposure adjustment, then click the Mask icon and paint over the face. Use a soft brush with low opacity for smooth transitions. You can also use gradient masks for sky or ground adjustments.
Tip 3: Work with RAW Files
If your camera supports RAW format, always shoot in RAW. RAW files contain more data than JPEGs, giving you greater flexibility when editing. Luminar handles RAW files exceptionally well. When you open a RAW file, you will see additional controls in the Develop tab, such as White Balance, Noise Reduction, and Lens Correction. Adjust these before applying any creative filters for the best results.
Tip 4: Use the History Panel
If you make a mistake or want to try a different approach, use the History panel. It records every action you take, from the first adjustment to the last. Click on any step in the history to revert to that state. You can also save multiple versions of your edit by using Snapshots. This allows you to compare different looks without losing your work.
Tip 5: Take Advantage of Plugins
If you already use Adobe Lightroom or Photoshop, install Luminar as a plugin. This allows you to send a photo from Lightroom to Luminar, edit it, and then send it back with the changes applied. The integration is seamless and preserves your layer structure. To set this up, go to Luminar’s preferences and select Plugins. Follow the instructions to connect to your Adobe software.
Tip 6: Experiment with Blend Modes
When working with layers, blend modes can dramatically change the look of your image. For example, use Multiply to darken an image or add shadows. Use Screen to brighten or add light effects. Use Overlay to increase contrast and saturation. Try different blend modes to see how they interact with your layers. This is especially useful for adding textures, gradients, or double exposures.
Tip 7: Optimize Performance
If Luminar feels slow, especially when editing large RAW files, adjust the performance settings. Go to Edit > Preferences (Windows) or Luminar > Preferences (macOS). Under the Performance tab, reduce the Preview Quality to “Faster” during editing. You can also limit the Undo History to 10 steps to save memory. For batch processing, close other applications to free up system resources.
Conclusion
Skylum’s Luminar is a versatile and beginner-friendly photo editing tool that leverages artificial intelligence to simplify complex tasks. Whether you are enhancing a single portrait, replacing a dull sky, or processing hundreds of travel photos, Luminar provides the tools you need in an intuitive interface. By following this tutorial, you now have a solid foundation to start editing your own photos. Remember to experiment with the AI tools, explore creative filters, and practice using layers and masks. With time, you will develop your own workflow and create stunning images with ease. For further learning, visit the Skylum website at https://skylum.com for video tutorials, community forums, and update releases.

Skylum
Creative imaging software for photographers and digital artists.