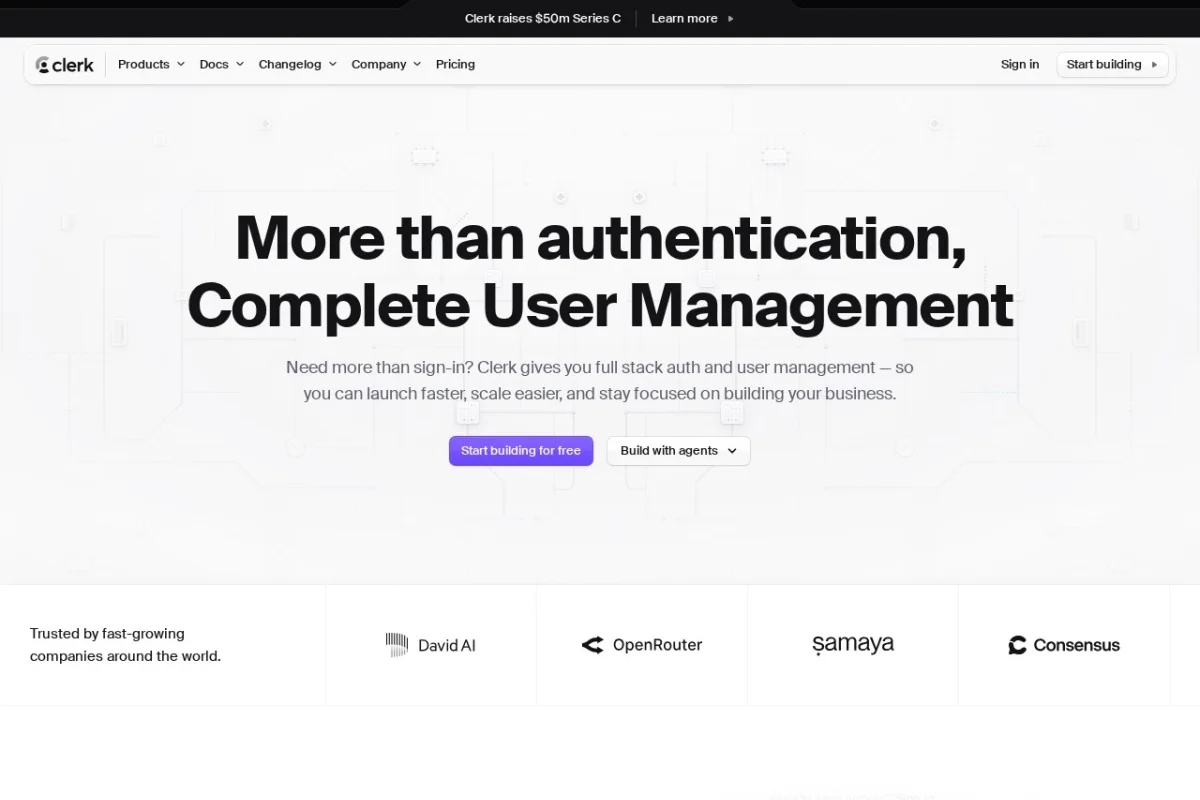
Introduction to Clerk Authentication and User Management
In modern web and mobile application development, implementing authentication and user management is one of the most critical yet time-consuming tasks. Developers must handle password hashing, session tokens, email verification, social login integrations, and security best practices—all while ensuring a smooth user experience. This is where Clerk comes in.
Clerk is a complete authentication and user management platform designed specifically for developers who want to offload the complexity of user identity management. Instead of building authentication from scratch or wrestling with complicated libraries, Clerk provides pre-built, customizable components that you can drop into your application in minutes. Whether you are building a Next.js app, a React Native mobile application, or a traditional web app, Clerk handles everything from sign-up flows to multi-factor authentication.
What makes Clerk stand out is its focus on both developer experience and security. You get features like session management, role-based access control, webhook support, and social login integrations out of the box. The platform is built for scalability, meaning it works just as well for a small side project as it does for a production application serving millions of users.
This tutorial will walk you through everything you need to know to get started with Clerk. By the end, you will understand how to integrate Clerk into your project, leverage its key features, and follow best practices for user management.
Getting Started with Clerk
Creating Your Clerk Account
Before you can start using Clerk, you need to create an account and set up your first application. Visit https://clerk.com and click on the “Sign Up” button. You can register using your email address, or you can sign up using a GitHub or Google account—which is fitting for a developer tool.
Once you have logged in, you will be taken to the Clerk Dashboard. This is your central hub for managing all your applications, users, and settings.
Creating Your First Application
In the dashboard, click on “Add Application.” You will be prompted to give your application a name. Choose something descriptive, like “My Saas App” or “E-commerce Platform.”
Clerk will then ask you to select your preferred authentication strategy. You can choose between:
- Standard Authentication – Email and password-based login
- Social Login Only – Users sign in with Google, GitHub, Facebook, etc.
- Passwordless Authentication – Users sign in with a magic link or one-time code
For most applications, starting with Standard Authentication plus Social Login is a good choice. You can always change these settings later.
Getting Your API Keys
After creating your application, Clerk will generate your unique API Keys. You will see two keys:
- Publishable Key – This key is safe to expose in your frontend code
- Secret Key – This key must be kept server-side and never exposed to users
Copy both keys and store them securely. You will need them when integrating Clerk into your codebase.
Installing Clerk in Your Project
Clerk provides SDKs for popular frameworks. The installation process varies slightly depending on your stack:
For Next.js:
- Run
npm install @clerk/nextjsin your terminal - Create a
.env.localfile and add your keys:
NEXT_PUBLIC_CLERK_PUBLISHABLE_KEY=your_publishable_key
CLERK_SECRET_KEY=your_secret_key
For React:
- Run
npm install @clerk/clerk-react - Wrap your root component with the
ClerkProviderand pass your publishable key
For React Native:
- Run
npm install @clerk/clerk-expo - Follow the Expo-specific setup instructions in the Clerk documentation
Once the SDK is installed, you can start using Clerk’s components immediately.
Key Features of Clerk
Pre-Built Authentication Components
One of Clerk’s biggest selling points is its library of pre-built UI components. Instead of designing sign-in and sign-up forms from scratch, you can use Clerk’s ready-made components. These include:
- – A complete sign-in form with email, password, and social login buttons
- – A sign-up form with validation and optional fields
- – A full profile management page where users can update their name, email, password, and connected accounts
- – A dropdown button that shows the user’s avatar and provides access to their profile and sign-out
These components are fully customizable using CSS or Tailwind CSS, so they can match your application’s design system.
Social Login Integrations
Clerk supports over 20 social login providers, including Google, GitHub, Facebook, Apple, Microsoft, Twitter, Discord, and LinkedIn. Setting up social login is straightforward:
- Go to the Clerk Dashboard and navigate to “Social Connections”
- Enable the providers you want to support
- Follow the instructions to get API keys from each provider (e.g., Google Cloud Console, GitHub Developer Settings)
- Enter those keys in the Clerk Dashboard
Once configured, social login buttons will automatically appear in your Clerk components.
Multi-Factor Authentication (MFA)
For applications that require extra security, Clerk offers Multi-Factor Authentication. You can enforce MFA for all users or just for users with specific roles. Clerk supports:
- Authenticator apps (like Google Authenticator or Authy)
- SMS-based codes
- Backup codes for account recovery
MFA can be configured from the Dashboard under “Security” settings. You can also programmatically check if a user has MFA enabled and prompt them to set it up.
Session Management
Clerk handles all session management automatically. When a user signs in, Clerk creates a secure session and provides a session token. This token is used to authenticate API requests. Key session features include:
- Automatic token refresh – Sessions are refreshed without user intervention
- Session revocation – Admins can revoke sessions from the Dashboard
- Concurrent session limits – You can limit how many devices a user can be signed into
- Session duration control – Set how long a session remains valid
User Profile Management
Clerk provides a complete user profile management system. Users can:
- Update their name, email, and profile picture
- Change their password
- Connect or disconnect social accounts
- Enable or disable multi-factor authentication
- View their active sessions and sign out of other devices
You can also extend the user profile with metadata. For example, you can store a user’s subscription tier, address, or preferences in public or private metadata fields.
Role-Based Access Control (RBAC)
For applications with different user types (e.g., admin, moderator, subscriber), Clerk offers Role-Based Access Control. You can:
- Create custom roles in the Dashboard
- Assign roles to users manually or programmatically
- Check a user’s role in your code to conditionally render UI or restrict API access
- Use permissions for granular control over specific actions
Webhook and API Support
Clerk provides webhooks that fire events like user.created, user.updated, session.created, and session.ended. This allows you to sync user data with your own backend or trigger custom workflows.
Additionally, Clerk has a REST API that lets you manage users, sessions, and organizations programmatically. This is useful for admin panels, bulk operations, and server-side logic.
How to Use Clerk: A Step-by-Step Guide
Step 1: Wrap Your Application with ClerkProvider
In any Clerk-integrated application, the first step is to wrap your root component with the ClerkProvider. This component provides authentication context to all child components.
For a Next.js app, you would do this in your layout.tsx or _app.tsx file. Import the provider and pass your publishable key:
import { ClerkProvider } from '@clerk/nextjs'

export default function RootLayout({ children }) {
  return (
    <ClerkProvider>
      <html lang="en">
        <body>{children}</body>
      </html>
    </ClerkProvider>
  )
}
Step 2: Add Authentication Components to Your Pages
Now you can add Clerk components to any page. For a sign-in page, create a new file and use the component:
import { SignIn } from '@clerk/nextjs'

export default function SignInPage() {
  return (
    <div>
      <SignIn />
    </div>
  )
}
Similarly, for a sign-up page, use . These components are fully functional out of the box. They handle form validation, error messages, and redirection after successful authentication.
Step 3: Protect Routes and Display User Information
To protect a page so that only authenticated users can access it, use Clerk’s auth() helper or the component. For example, in Next.js:
import { auth } from '@clerk/nextjs'
import { redirect } from 'next/navigation'

export default function DashboardPage() {
  const { userId } = auth()

  if (!userId) {
    redirect('/sign-in')
  }

  return <div>Welcome, authenticated user!</div>
}
To display the current user’s name or avatar, use the useUser() hook:
import { useUser } from '@clerk/nextjs'

export default function Profile() {
  const { isLoaded, isSignedIn, user } = useUser()

  if (!isLoaded) return <div>Loading...</div>
  if (!isSignedIn) return <div>Sign in to view this page</div>

  return <div>Hello, {user.firstName}!</div>
}
Step 4: Implement Role-Based Access Control
If you have defined roles in the Clerk Dashboard, you can check a user’s role in your code. For example, to show an admin panel only to users with the “admin” role:
import { auth } from '@clerk/nextjs'

export default function AdminPage() {
  const { userId, sessionClaims } = auth()

  if (sessionClaims?.metadata?.role !== 'admin') {
    return <div>Access denied.</div>
  }

  return <div>Admin dashboard content here.</div>
}
Step 5: Set Up Webhooks for Backend Integration
To react to user events in your own backend, set up a webhook endpoint. In the Clerk Dashboard, go to “Webhooks” and add an endpoint URL (e.g., https://yourapp.com/api/webhooks/clerk). Then, create an API route that handles the webhook payload:
import { Webhook } from 'svix'
import { headers } from 'next/headers'

export async function POST(req) {
  const WEBHOOK_SECRET = process.env.CLERK_WEBHOOK_SECRET
  const headerPayload = headers()
  const svixId = headerPayload.get("svix-id")
  const svixTimestamp = headerPayload.get("svix-timestamp")
  const svixSignature = headerPayload.get("svix-signature")

  if (!svixId || !svixTimestamp || !svixSignature) {
    return new Response('Error occurred', { status: 400 })
  }

  const payload = await req.json()
  const body = JSON.stringify(payload)

  const wh = new Webhook(WEBHOOK_SECRET)
  let evt

  try {
    evt = wh.verify(body, {
      "svix-id": svixId,
      "svix-timestamp": svixTimestamp,
      "svix-signature": svixSignature,
    })
  } catch (err) {
    return new Response('Error occurred', { status: 400 })
  }

  // Handle the event
  if (evt.type === 'user.created') {
    // Create a user in your database
    console.log('New user created:', evt.data.id)
  }

  return new Response('Success', { status: 200 })
}
Tips for Using Clerk Effectively
Tip 1: Customize the Look and Feel
Clerk’s components are built with Tailwind CSS and are fully customizable. You can pass a appearance prop to any component to change colors, fonts, and spacing. For example:
<SignIn appearance={{
  elements: {
    card: "bg-gray-100 shadow-xl",
    headerTitle: "text-2xl font-bold text-blue-600",
    socialButtonsBlockButton: "bg-white border border-gray-300"
  }
}} />
You can also use CSS variables to globally style all Clerk components. Check the documentation for a full list of customization options.
Tip 2: Use Environment Variables for Security
Never hardcode your Clerk API keys in your source code. Always use environment variables. For local development, use a .env.local file. For production, set environment variables in your hosting platform (Vercel, Netlify, AWS, etc.).
Tip 3: Leverage User Metadata
Clerk allows you to store public metadata (visible to the user) and private metadata (visible only to your server). Use public metadata for things like display preferences. Use private metadata for sensitive information like internal user IDs or subscription status.
You can set metadata from the Dashboard or programmatically using the Clerk API.
Tip 4: Test with Multiple Users
During development, create multiple test users in the Clerk Dashboard. This will help you test different roles, MFA flows, and social login scenarios. You can also use the “Impersonate” feature to temporarily sign in as any user to debug issues.
Tip 5: Monitor Webhook Events
When you first set up webhooks, enable Clerk’s webhook logging feature. This logs all webhook attempts and their responses, making it easier to debug integration issues. You can find this in the Dashboard under “Webhooks” > “Logs.”
Tip 6: Understand Session Token Structure
Clerk uses JWTs (JSON Web Tokens) for session management. You can decode these tokens to inspect the claims. The token includes the user ID, role, and any custom metadata. Understanding the token structure is useful when implementing custom authorization logic.
Tip 7: Enable Multi-Factor Authentication Early
If your application handles sensitive data, enable MFA from the start. It is much harder to retroactively enforce MFA once you have a large user base. Clerk makes it easy to require MFA for all users or just for specific roles.
Tip 8: Use Clerk’s Organization Features for Multi-Tenant Apps
If you are building a SaaS application where users belong to organizations or teams, explore Clerk’s Organizations feature. It allows you to create organizations, invite members, and manage permissions at the organization level. This is more scalable than building your own multi-tenancy system.
Tip 9: Keep Your SDK Updated
Clerk releases updates regularly with new features, security patches, and performance improvements. Subscribe to Clerk’s changelog or enable automatic dependency updates in your project to stay current.
Tip 10: Read the
 🔧 Tool Featured in This Tutorial
Clerk Authentication and User Management
Clerk provides authentication and user management for modern applications.
Clerk Authentication and User Management
Clerk provides authentication and user management for modern applications.