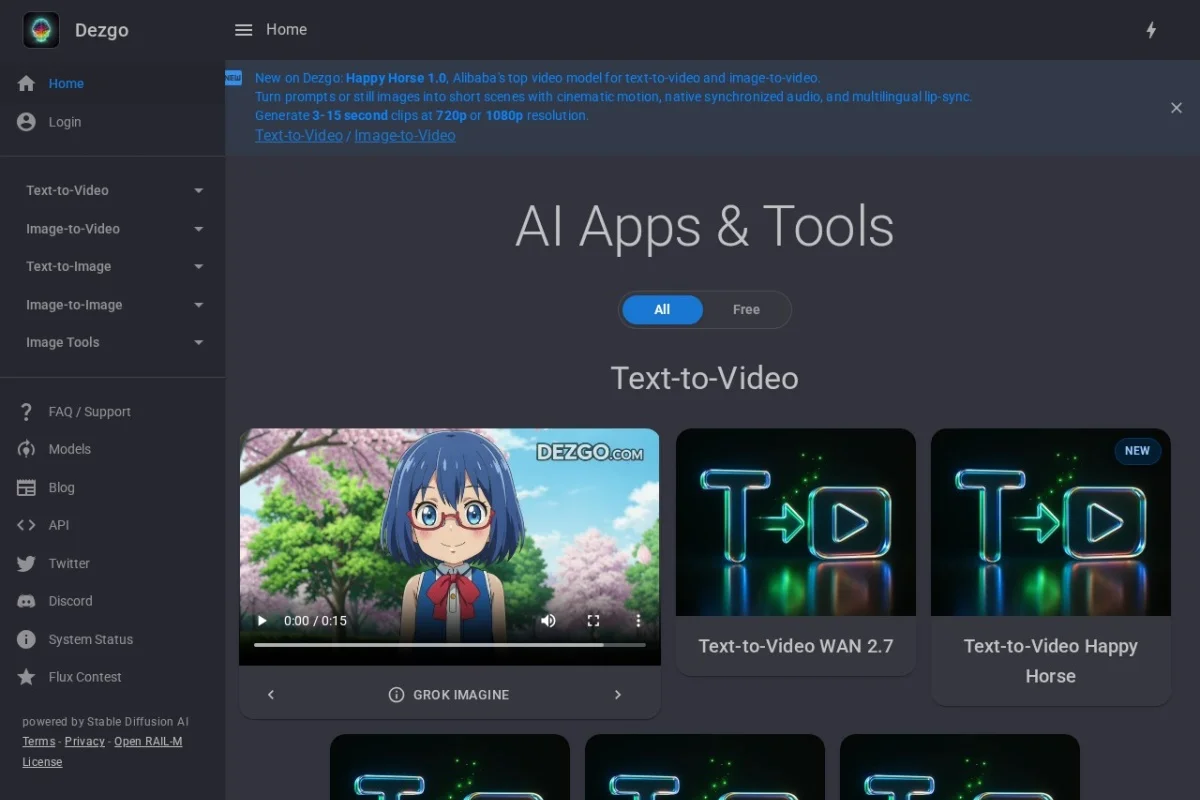
Introduction to Dezgo
In the rapidly evolving world of artificial intelligence, Dezgo stands out as a powerful yet accessible tool for creating visual content. Whether you are a digital artist looking for inspiration, a content creator needing quick visuals, or simply someone curious about AI-generated art, Dezgo offers a free and user-friendly platform. Unlike many other AI generators that require subscriptions or account creation, Dezgo allows you to start generating images and videos immediately without signing up. This makes it an excellent entry point for beginners who want to experiment with AI without commitment.
Dezgo operates entirely in your web browser. It uses advanced machine learning models to interpret your text prompts and transform them into unique visual outputs. The platform supports a wide range of artistic styles, from photorealistic images to anime, fantasy art, and abstract compositions. Beyond simple text-to-image generation, Dezgo also provides tools for upscaling, inpainting, and even creating short video clips from text descriptions. This tutorial will guide you through every aspect of Dezgo, ensuring you can harness its full potential from your very first use.
Getting Started with Dezgo
Accessing the Platform
To begin, navigate to https://dezgo.com/ using any modern web browser such as Chrome, Firefox, Edge, or Safari. No download or installation is required. The website loads quickly and presents you with a clean, straightforward interface. Upon arrival, you will see the main generation interface with a text input box at the top, a “Generate” button, and various settings panels below.
No Account Required
One of the most appealing aspects of Dezgo is that it requires no registration or login. You can start creating immediately. However, keep in mind that without an account, your generated images are not saved permanently on the server. If you want to keep your creations, you must download them to your device. The platform does offer optional features like saving your generation history if you choose to create a free account, but this is entirely optional.
Understanding the Interface
The main interface is divided into several key areas:
- Prompt Input Box: A large text field at the top where you type your description of the image or video you want to create.
- Negative Prompt Box: Located below the main prompt, this field allows you to specify what you do not want in the image.
- Model Selector: A dropdown menu that lets you choose between different AI models (e.g., Stable Diffusion 1.5, SDXL, Realistic Vision).
- Settings Panel: Contains options for image size, sampling steps, CFG scale, seed, and more.
- Generate Button: The large button that initiates the creation process.
- Output Area: Where your generated image or video appears after processing.
Key Features of Dezgo
Text-to-Image Generation
This is the core feature of Dezgo. You provide a textual description, and the AI creates a corresponding image. The quality and style of the image depend heavily on the model you select and the detail in your prompt. You can generate anything from simple objects to complex scenes with multiple characters and environments.
Text-to-Video Generation
Dezgo also supports generating short video clips from text prompts. While the video generation is not as advanced as dedicated video AI tools, it is impressive for a free platform. You can create looping animations, subtle motion effects, or simple scene transitions based on your description. This feature is excellent for creating background visuals or social media content.
Multiple AI Models
Dezgo offers a variety of pre-trained models, each with different strengths:
- Stable Diffusion 1.5: A versatile and well-balanced model suitable for general use.
- SDXL (Stable Diffusion XL): Produces higher resolution and more detailed images with better composition.
- Realistic Vision: Specializes in photorealistic outputs, great for portraits and lifelike scenes.
- Anime and Cartoon Models: Designed for stylized art, manga, and animation aesthetics.
- Fantasy and Concept Art Models: Excellent for creating imaginative landscapes and characters.
Image Editing and Enhancement Tools
Beyond generation, Dezgo includes several editing capabilities:
- Inpainting: Allows you to select a specific area of an image and regenerate it with a new prompt. This is useful for fixing errors or changing elements.
- Outpainting: Expands the canvas of an existing image beyond its original borders, filling in the new area with AI-generated content.
- Image-to-Image: Takes an existing image as a starting point and modifies it based on your text prompt, preserving the original composition.
- Upscaling: Increases the resolution of your generated images without losing quality, making them suitable for printing or high-resolution displays.
Free and Unlimited Use
Dezgo does not impose strict usage limits. You can generate as many images as you want. However, during peak times, you may experience slower generation speeds. The platform is supported by optional donations and a “tip” system, but all core features remain free.
How to Use Dezgo: A Step-by-Step Guide
Generating Your First Image
Step 1: Write a Prompt
In the main prompt box, type a detailed description of what you want to see. For example: “A serene mountain lake at sunset with pine trees reflected in the water, photorealistic style, warm golden light.” The more detail you provide, the better the AI can interpret your vision.
Step 2: Set a Negative Prompt (Optional)
In the negative prompt box, describe elements you want to avoid. For example: “blurry, low quality, distorted faces, extra limbs, ugly, deformed.” This helps the AI steer clear of common artifacts.
Step 3: Choose a Model
From the dropdown menu, select a model that matches your desired style. For photorealistic results, choose “Realistic Vision.” For artistic interpretations, try “SDXL” or “Stable Diffusion 1.5.”
Step 4: Adjust Settings
You can modify several parameters to fine-tune the output:
- Width and Height: Choose the aspect ratio and resolution. Common options include 512×512, 768×768, or 1024×1024. Larger sizes take longer to generate.
- Steps: The number of denoising steps. Higher values (30-50) produce more refined images but take longer. Lower values (10-20) are faster but may be less detailed.
- CFG Scale: Controls how closely the AI follows your prompt. A value of 7-12 is standard. Higher values (15-20) adhere more strictly to the prompt but may reduce creativity.
- Seed: A number that determines the starting point for generation. Using the same prompt and seed will produce the same image. Leave it blank for random results.
Step 5: Generate
Click the “Generate” button. A progress bar will appear. Depending on the model and settings, generation may take anywhere from a few seconds to a minute. Once complete, the image will appear in the output area.
Step 6: Download or Edit
Below the generated image, you will find options to download it in PNG or JPEG format. You can also click “Edit” to send the image to the inpainting or image-to-image tools for further refinement.
Creating a Video
Step 1: Switch to Video Mode
On the main page, look for a tab or button that says “Video” or “Text-to-Video.” Click it to switch modes.
Step 2: Write a Video Prompt
Describe the motion and scene you want. For example: “A cat walking through a sunlit garden, flowers swaying in the breeze, gentle camera pan.” Focus on action words and movement.
Step 3: Select Video Settings
You can choose the video length (usually 2-4 seconds), frame rate, and resolution. Keep in mind that longer videos with higher resolution require more processing time.
Step 4: Generate and Download
Click “Generate” and wait for the video to be created. Once ready, you can preview it in the browser and download it as an MP4 file.
Using the Inpainting Tool
Step 1: Upload or Generate an Image
Start with an image you have already generated or upload one from your computer.
Step 2: Select the Area to Modify
Use the brush tool to paint over the part of the image you want to change. You can adjust brush size for precision.
Step 3: Write a New Prompt
In the prompt box, describe what you want to appear in the selected area. For example, if you want to change a tree into a house, write: “A small wooden cottage with a chimney.”
Step 4: Generate the Edit
Click “Generate” and the AI will fill the selected area with new content that matches your description, blending it with the rest of the image.
Upscaling an Image
Step 1: Open the Upscaling Tool
From the main menu, navigate to the “Upscale” or “Enhance” section.
Step 2: Upload Your Image
Select the image you want to upscale. You can use one you generated earlier or any image from your device.
Step 3: Choose Upscale Factor
Select how much you want to increase the resolution (e.g., 2x, 4x). The AI will add detail to the enlarged image.
Step 4: Download the Result
Once processed, download the high-resolution version. This is ideal for printing or using as a wallpaper.
Tips for Getting the Best Results
Writing Effective Prompts
The quality of your output depends largely on your prompt. Follow these guidelines:
- Be Specific: Instead of “a dog,” write “a golden retriever puppy sitting on a grassy hill under a blue sky.”
- Include Style Keywords: Add terms like “photorealistic,” “oil painting,” “anime style,” “cinematic lighting,” or “digital art” to steer the aesthetic.
- Use Composition Descriptors: Words like “close-up,” “wide shot,” “portrait,” or “bird’s eye view” help frame the image.
- Mention Colors and Lighting: Descriptions such as “vibrant colors,” “soft morning light,” or “dramatic shadows” improve atmosphere.
- Avoid Overloading: Too many conflicting elements can confuse the AI. Stick to 2-4 main subjects or concepts.
Optimizing Settings for Your Goal
- For Speed: Use smaller resolutions (512×512) and lower step counts (15-20). Choose the Stable Diffusion 1.5 model.
- For Quality: Use SDXL or Realistic Vision with 40-50 steps and a CFG scale of 10-12. Select 1024×1024 resolution if your device can handle it.
- For Consistency: If you want to generate a series of similar images, note the seed number from a good result and reuse it with slight prompt variations.
- For Fixing Artifacts: If faces or hands look distorted, add “perfect hands,” “symmetrical face,” or “natural anatomy” to your positive prompt, and reinforce negative prompts with “bad anatomy,” “extra fingers,” “mutated hands.”
Leveraging Negative Prompts
The negative prompt is one of your most powerful tools. Always include common issues you want to avoid:
- “blurry, low quality, pixelated, ugly, deformed, distorted, watermark, text, signature”
- “extra limbs, missing arms, bad anatomy, weird eyes, unnatural pose”
- “oversaturated, washed out, bad lighting, noisy”
Experimenting with Models
Do not stick to one model. Each model has unique strengths. For example:
- Use Realistic Vision for portraits, landscapes, and product mockups.
- Use Anime models for character designs and manga-style illustrations.
- Use SDXL for complex scenes requiring high detail and accurate composition.
- Use Fantasy models for magical environments, mythical creatures, and epic scenes.
Saving and Organizing Your Work
Since Dezgo does not automatically save your generations, develop a habit of downloading immediately. Create folders on your computer organized by date, project, or style. If you generate variations of the same prompt, rename files with the seed number for easy reference. Consider using a free cloud storage service to back up your favorite creations.
Respecting Ethical Guidelines
Dezgo, like all AI tools, comes with responsibility. Do not use the platform to generate harmful, violent, or deceptive content. Avoid creating images of real people without consent or generating material that infringes on copyrights. Be mindful of the platform’s terms of service, which typically prohibit explicit or abusive content. Use AI as a tool for creativity and inspiration, not for misleading others.
Troubleshooting Common Issues
- Generation is too slow: Try reducing image size or step count. Also, check your internet connection.
- Results are low quality: Increase steps and CFG scale. Switch to a more advanced model like SDXL.
- AI ignores your prompt: Simplify your prompt or remove conflicting elements. Ensure you are using the correct model for the style.
- Video generation fails: Keep prompts simple and focus on motion. Reduce video length to 2 seconds.
- Browser freezes: Close other tabs and applications. Dezgo runs in the browser, so it uses your system’s resources.
With this comprehensive guide, you are now equipped to explore Dezgo confidently. Start with simple prompts, experiment with different models, and gradually incorporate advanced techniques like inpainting and upscaling. The platform is forgiving and encourages experimentation—every generation teaches you something new about how AI interprets language. Enjoy the creative journey and the limitless possibilities that Dezgo places at your fingertips.
Dezgo - Free Online AI Image/Video Generator
Free online AI tool for generating images and videos from text.