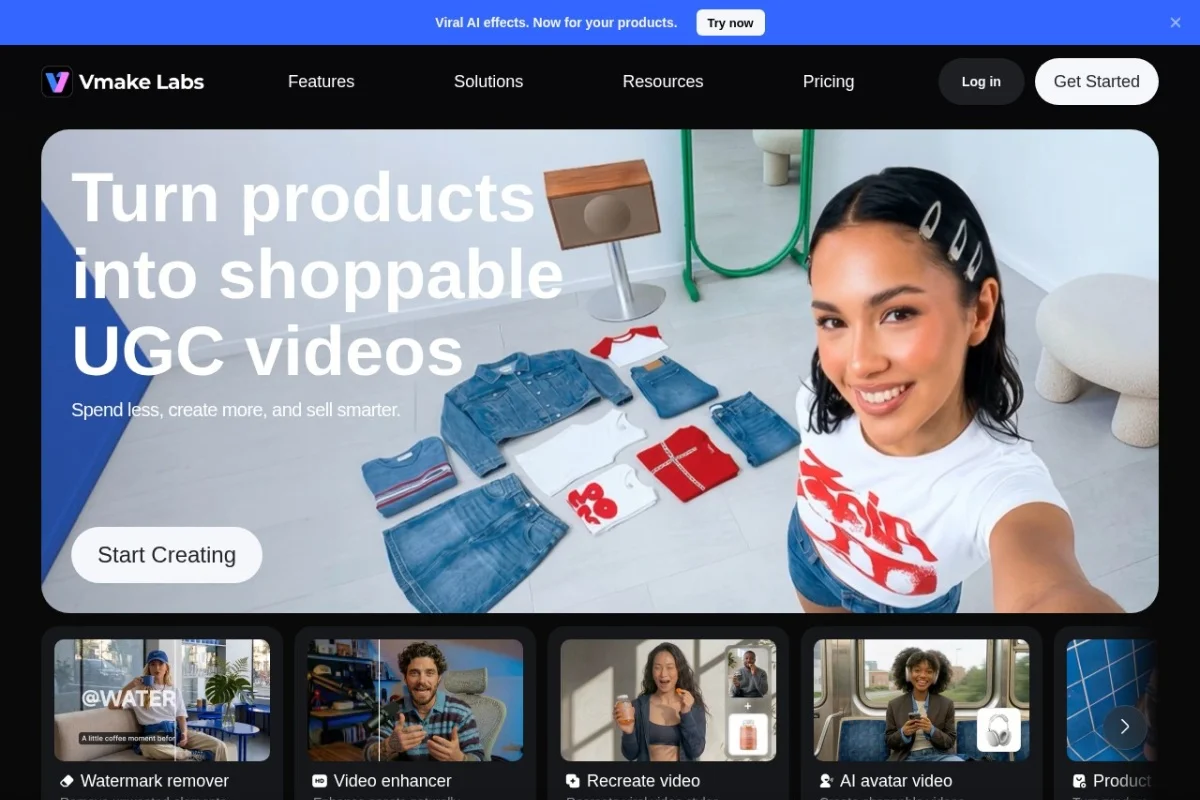
Introduction to Vmake AI: The Ultimate UGC Video Generator for E-Commerce
In the fast-paced world of e-commerce, video content has become the undisputed king of engagement. User-generated content (UGC) videos, in particular, have proven to be remarkably effective at building trust, showcasing products in real-world scenarios, and driving conversions. However, creating high-quality UGC videos at scale has traditionally been a time-consuming and expensive process, often requiring professional videographers, actors, and editors.
Vmake AI is a revolutionary tool designed to solve this exact problem. It is an ultimate UGC video generator that leverages artificial intelligence to help e-commerce businesses create authentic-looking, high-quality user-generated content videos automatically. By simply providing a product link, Vmake AI can generate dozens of unique video variations that look and feel like they were created by real users, complete with realistic voiceovers, dynamic editing, and on-brand styling. This tutorial will guide you through everything you need to know to start using Vmake AI effectively, from initial setup to advanced batch production techniques.
Whether you are a solo entrepreneur running a small Shopify store or a marketing manager at a large e-commerce brand, Vmake AI promises to save you countless hours of manual work while dramatically increasing your video output. Let us dive into how you can harness this powerful tool to boost your engagement and sales.
Getting Started with Vmake AI
Creating Your Account and Dashboard Overview
To begin your journey with Vmake AI, navigate to the official website at https://vmake.ai/. You will find a clear “Sign Up” or “Get Started” button on the homepage. Registration is straightforward: you can sign up using your email address or, for even faster access, use your Google or Facebook account credentials. Once you have verified your email, you will be logged into the main dashboard.
The dashboard is designed with simplicity in mind. On the left-hand side, you will find the main navigation menu with sections such as “Create Video,” “My Videos,” “Templates,” and “Settings.” The central area of the dashboard is your workspace, where you will initiate new projects and manage existing ones. Take a few minutes to familiarize yourself with the layout. You will notice a prominent “New Video” button in the top right corner – this will be your primary starting point for every new project.
Understanding the Pricing and Subscription Plans
Before you start creating videos, it is important to understand Vmake AI’s pricing structure. The tool typically offers a tiered subscription model. Most plans include a free trial or a limited free tier that allows you to generate a few videos to test the platform. Paid plans, such as the “Starter,” “Pro,” and “Enterprise” tiers, unlock higher video generation limits, batch processing capabilities, premium templates, and priority support.
For beginners, it is highly recommended to start with the free trial. This will allow you to explore the features without any financial commitment. As you become more comfortable and understand your video volume needs, you can upgrade to a paid plan that matches your business scale. Keep an eye on the “Usage” section in your dashboard to monitor how many video credits you have left.
Key Features of Vmake AI
AI-Powered Video Generation from Product Links
This is the core feature that sets Vmake AI apart. Instead of manually filming and editing, you simply paste a URL of your product page (from platforms like Shopify, Amazon, or your own website). The AI then scrapes the product information, including images, descriptions, and key selling points, and automatically generates a complete video script and storyboard. This feature transforms a static product page into a dynamic, engaging video in minutes.
Automated UGC-Style Video Creation
Vmake AI specializes in creating videos that mimic the authentic, unpolished feel of real user-generated content. The AI uses advanced algorithms to add natural-looking camera movements, realistic background noise, and casual voiceover styles. This is crucial because modern consumers often trust a “real person’s” review more than a polished brand commercial. The tool can generate videos that look like unboxings, testimonials, or “day in the life” product demonstrations.
Customizable Templates and Branding
While the AI handles the heavy lifting, you retain full creative control. Vmake AI provides a library of customizable templates designed for various product categories (e.g., beauty, tech, fashion, home goods). You can modify the color palette, fonts, logo placement, and intro/outro animations to match your brand identity. This ensures that every video, while appearing UGC-style, still reinforces your brand presence.
Batch Video Production for Scale
For businesses that need to produce hundreds of videos for multiple products, Vmake AI offers a powerful batch production feature. You can upload a spreadsheet of product links, and the AI will generate a unique video for each product simultaneously. This is an absolute game-changer for dropshippers, large catalog stores, and agencies managing multiple clients. Batch production ensures you never run out of fresh content for social media, ads, or product pages.
Integration with E-Commerce Platforms
Vmake AI is built to work seamlessly with your existing e-commerce ecosystem. It offers direct integrations with major platforms like Shopify, WooCommerce, and Magento. Through these integrations, you can automatically import product data, create videos, and even publish the final video directly back to your product pages. This creates a smooth, end-to-end workflow that saves you from manual file downloads and uploads.
How to Use Vmake AI: A Step-by-Step Guide
Step 1: Creating Your First Video from a Product Link
Click on the “New Video” button on your dashboard. You will be presented with a simple input field. Paste the URL of the product you want to feature. For example, if you sell a wireless Bluetooth speaker, paste the link to that product’s page. Click “Generate” or “Next.”
The AI will take a few seconds to analyze the link. It will extract the product name, key features (like “waterproof,” “10-hour battery life”), and high-resolution images. You will then see a preview of the generated script and a selection of suggested visual scenes. Review this content. You can edit the text directly if you want to emphasize a different selling point or change the tone of the voiceover.
Step 2: Choosing a Template and Style
After the AI generates the base content, you will be taken to the “Style Selection” screen. Here, you can choose from a variety of UGC-style templates. Options might include “Unboxing,” “Daily Use,” “Review,” or “Comparison.” Select the style that best fits your product. For the Bluetooth speaker, an “Outdoor Use” or “Daily Use” template would work well.
Next, choose the visual aesthetic. You can select a color filter, background music genre (e.g., upbeat, chill, corporate), and voiceover type. Vmake AI offers multiple AI voices, including male, female, and various accents. Listen to a preview of each voice to find one that sounds authentic and matches your brand’s personality.
Step 3: Customizing Your Branding
This step is crucial for maintaining brand consistency. Look for the “Branding” or “Customize” tab. Here, you can upload your logo and choose where it appears in the video (e.g., top corner for the first 5 seconds, or as a watermark throughout). You can also set your brand colors by entering hex codes or using a color picker. If you have specific fonts you use for your marketing, check if they are available in the font library. Apply these settings to ensure the video feels like it belongs to your brand, even though it has a UGC style.
Step 4: Reviewing and Editing the Video
Once you have selected the style and branding, click “Generate Preview.” The AI will process your inputs and produce a draft video. This usually takes 1-3 minutes. Once the preview is ready, watch it carefully. Pay attention to the following:
- Voiceover flow: Does the AI voice sound natural? Are there awkward pauses?
- Visual transitions: Do the images and video clips transition smoothly?
- Product focus: Is the product clearly visible and highlighted?
- Call to action: Does the video end with a clear instruction (e.g., “Buy now,” “Link in bio”)?
If you see any issues, use the “Edit” button to make adjustments. You can swap out specific images, change scene durations, rewrite text overlays, or replace the background music. The editing interface is intuitive and works like a simple timeline.
Step 5: Generating the Final Video and Exporting
After you are satisfied with the preview, click “Generate Final Video.” The AI will render the video in high resolution (typically 1080p). Once rendering is complete, you will have several options:
- Download: Save the video as an MP4 file to your computer.
- Share: Get a direct link to share on social media or with your team.
- Publish: If you have connected your e-commerce platform, you can publish the video directly to your product page.
Step 6: Batch Production for Multiple Products
To scale your efforts, navigate to the “Batch Production” section in the dashboard. Click “Import Products.” You can upload a CSV or Excel file containing a list of product URLs in one column. You can also add columns for custom instructions, target audience, or preferred style for each product. Configure the batch settings (choose a single template for all or allow AI to choose the best template per product). Click “Start Batch.”
The system will queue all your videos. You can monitor progress in the “Batch Jobs” tab. Depending on the number of videos, this could take from a few minutes to an hour. Once complete, you can review and download each video individually, or export them all as a zip file.
Tips for Getting the Most Out of Vmake AI
Optimize Your Product Pages for Better AI Output
The quality of your input directly affects the quality of the output. Before using Vmake AI, ensure your product pages are well-optimized. This means having high-resolution images (at least 1000×1000 pixels), detailed and benefit-focused descriptions (not just features), and clear pricing. The AI reads this text to generate the script. If your description is thin, the video will feel generic. Write your product descriptions as if you are talking to a friend – this helps the AI create a more natural UGC script.
Experiment with Different AI Voices and Styles
Do not settle for the first voice or template you try. Vmake AI offers a wide variety of AI voices, from youthful and energetic to mature and authoritative. Test different voices on the same product to see which one resonates best with your target audience. Similarly, try different UGC styles. A “Review” style might work best for electronics, while an “Unboxing” style could be perfect for beauty products. Run A/B tests on your social media ads to see which style drives the highest click-through rates.
Use Custom Scripts for Specific Campaigns
While the auto-generated script is convenient, you have the option to write your own script or heavily edit the AI’s output. For important campaigns, such as a holiday sale or a new product launch, take the time to manually craft a compelling script. Include specific keywords, a strong hook in the first 3 seconds, and a clear call to action. The AI will then match its visual generation to your custom script, resulting in a much more targeted video.
Maintain a Consistent Content Calendar
One of the biggest advantages of Vmake AI is its speed. Use this to your advantage by planning a content calendar. For example, commit to creating 5 new UGC videos every week using the batch feature. Post these across your social media channels (TikTok, Instagram Reels, YouTube Shorts) and on your product pages. Consistency is key to building an audience and improving SEO. Videos on product pages can increase conversion rates by up to 80%, so make it a habit to have a video for every new product you list.
Leverage the Analytics and Feedback Loop
If Vmake AI offers any analytics or performance tracking (check your dashboard), use it. Pay attention to which videos have the highest engagement or retention rates. Use this data to inform your future creations. For instance, if you notice that videos with a “fast-paced” editing style perform better, you can select that option more often. If a particular AI voice gets more comments, stick with it. Always be iterating based on real-world data, not just assumptions.
Combine UGC Videos with Paid Advertising
Vmake AI videos are perfect for paid social ads. Because they look like genuine user content, they often have lower cost-per-click (CPC) and higher conversion rates than polished brand ads. Create a library of 10-20 UGC videos for your best-selling products. Use them as ad creatives on Facebook Ads, TikTok Ads, and Google Ads. Rotate these videos frequently to avoid ad fatigue. The ability to generate fresh content quickly means you can always be testing new angles and offers.
Conclusion
Vmake AI is more than just a video generator; it is a complete content production system for modern e-commerce businesses. By automating the tedious process of scripting, filming, and editing, it empowers you to focus on strategy and growth. From a single product link to a batch of 100 videos, the platform delivers consistent, high-quality UGC content that builds trust and drives sales.
Remember, the key to success with any AI tool is experimentation and consistency. Start with the free trial, create a few videos for your best products, and analyze the results. As you become more proficient, scale your efforts using the batch production and integration features. With Vmake AI, you no longer need a big budget or a production team to compete in the video-first world of e-commerce. Your next viral UGC video is just a few clicks away.
