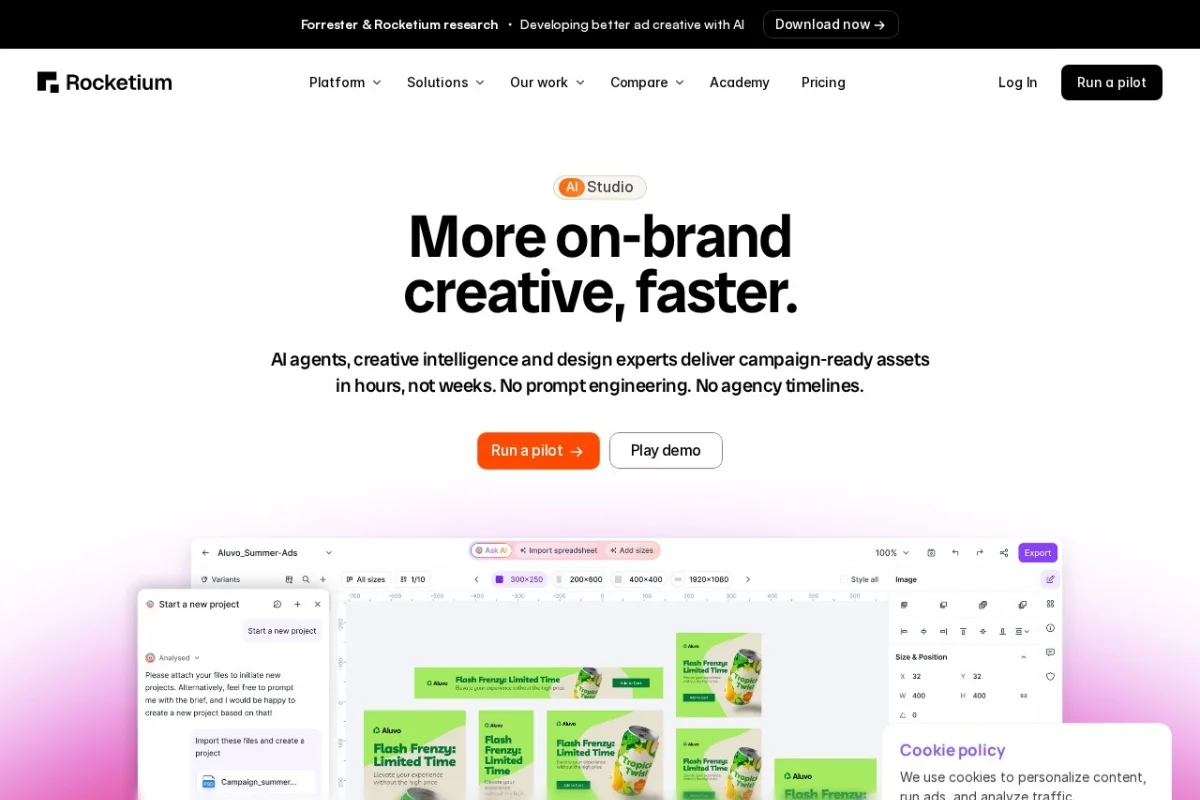
Introduction to Rocketium AI Studio
In the fast-paced world of digital marketing, creating high-quality visual content quickly is no longer a luxury—it is a necessity. Rocketium AI Studio is a powerful, cloud-based creative platform that leverages artificial intelligence to help you generate, edit, and scale video and image content with remarkable efficiency. Whether you are a seasoned marketer, a social media manager, a small business owner, or a content creator just starting out, this tool is designed to streamline your workflow and eliminate many of the tedious, time-consuming tasks associated with traditional video and image production.
Unlike many other tools that require steep learning curves or expensive subscriptions for each feature, Rocketium AI Studio combines several core capabilities into one unified interface. You can transform a simple text prompt into a fully animated video, create stunning visuals from scratch using AI image generation, and perform automated editing tasks that would normally take hours. The platform also includes robust brand kit integration, allowing you to maintain consistency across all your content, and collaboration tools that make it easy to work with team members in real-time.
This tutorial will guide you through every aspect of Rocketium AI Studio. By the end, you will understand how to set up your account, navigate the key features, create your first project, and apply practical tips to get the most out of the platform. Let us begin.
Getting Started with Rocketium AI Studio
Creating Your Account and Logging In
To begin using Rocketium AI Studio, visit the official website at https://rocketium.com/. On the homepage, locate the “Get Started” or “Sign Up” button, typically found in the top-right corner. You can register using your work email address or by connecting a Google account for faster access.
After signing up, you will be prompted to verify your email address. Check your inbox for a confirmation link and click it to activate your account. Once verified, log in to the platform. You will be greeted by the main dashboard, which serves as your command center for all projects.
Understanding the Dashboard Layout
The Rocketium AI Studio dashboard is designed to be intuitive. On the left-hand side, you will find a vertical navigation menu. This menu contains links to your projects, brand kits, team members, and account settings. The central area of the dashboard displays your recent projects and quick-start options. Take a moment to explore the interface so you can locate the following key sections:
- Projects: This is where all your video and image creations are stored. You can create new projects, organize them into folders, and manage drafts.
- Templates: A library of pre-designed video and image templates that you can customize. This is a great starting point for beginners.
- Brand Kit: A centralized space to store your brand assets, such as logos, colors, and fonts.
- Team: Manage team members and set permissions for collaboration.
Before diving into your first project, it is highly recommended to set up your Brand Kit. This will save you significant time later.
Setting Up Your Brand Kit
Click on the “Brand Kit” option in the left menu. Here, you can upload your company logo, define your primary and secondary brand colors using hex codes, and select the fonts you typically use. You can also add brand guidelines or notes for your team. Once saved, this kit will be available every time you create a new project, ensuring that all your content remains visually consistent without needing to manually adjust settings each time.
Key Features of Rocketium AI Studio
Text-to-Video Generation
This is arguably the most powerful feature in the platform. With text-to-video generation, you can input a script or a description of the video you want, and the AI will automatically generate a complete video with visuals, background music, voiceover, and transitions. You are not limited to a single style; you can choose from various visual themes, such as explainer videos, social media ads, or promotional clips. The AI analyzes your text and matches it with relevant stock footage, animations, and text overlays.
AI Image Creation
If you need custom images for your videos, social media posts, or website, the AI image creation tool allows you to generate them from text prompts. Simply describe the image you need—for example, “a futuristic cityscape at sunset with neon lights”—and the AI will produce several variations. You can then select the best one, edit it further, or use it directly in your video projects.
Automated Video Editing
Rocketium AI Studio also includes an automated video editor that can trim, cut, and rearrange clips based on your instructions. You can upload raw footage or use the AI to analyze a longer video and automatically extract the most engaging moments. The editor can also apply smart color correction, stabilize shaky footage, and add captions automatically. This is especially useful for repurposing long-form content into shorter clips for platforms like TikTok, Instagram Reels, or YouTube Shorts.
Brand Kit Integration
As mentioned earlier, the Brand Kit is not just a storage space—it is deeply integrated into every creative tool. When you generate a video or image, the AI will automatically apply your brand colors, fonts, and logo to the output. This ensures that every piece of content you create looks like it belongs to your brand, even if multiple team members are working on different projects.
Collaboration Tools
Rocketium AI Studio is designed for teams. You can invite team members via email, assign them roles (such as Editor, Viewer, or Admin), and leave comments directly on projects. The platform supports real-time collaboration, so multiple people can work on the same video or image simultaneously. This eliminates the back-and-forth of emailing files and version control issues.
How to Use Rocketium AI Studio: A Step-by-Step Guide
Creating Your First Text-to-Video Project
Let us walk through creating a simple promotional video using the text-to-video feature. This is the best way to understand the platform’s core workflow.
Step 1: Start a New Project
From the dashboard, click the “Create New” button. A menu will appear with options for “Video,” “Image,” and “Template.” Select “Video.” You will then see a choice between “Text to Video” and “Blank Canvas.” Choose “Text to Video.”
Step 2: Input Your Script
A text editor will open. Here, you can type or paste your script. For beginners, it is best to keep your script concise—around 50 to 100 words. For example, you might write: “Introducing our new eco-friendly water bottle. Made from recycled materials, it keeps your drinks cold for 24 hours. Perfect for hiking, work, or school. Order now and save 20 percent.”
Step 3: Select a Style and Aspect Ratio
Below the text editor, you will find options for “Style” and “Aspect Ratio.” The style determines the visual theme of your video (e.g., “Modern,” “Minimalist,” “Bold”). The aspect ratio should match your target platform: 16:9 for YouTube, 9:16 for Instagram Stories or TikTok, and 1:1 for Facebook posts. Make your selections based on where you plan to publish the video.
Step 4: Let the AI Generate the Video
Click the “Generate” button. The AI will process your script and style choices. This usually takes between 30 seconds to 2 minutes, depending on the length of your script and the server load. Once complete, a preview of your video will appear in the main workspace.
Step 5: Review and Edit
Play the video to see how the AI has interpreted your script. You will notice that it has added stock footage, text overlays for key phrases, background music, and a synthetic voiceover. If something does not look right, you can click on any element—such as a text box, an image, or the audio track—to edit it. You can replace a specific scene by clicking on it and searching for alternative stock footage within the platform’s library.
Step 6: Export and Share
Once you are satisfied with your video, click the “Export” button in the top-right corner. Choose your desired resolution (720p or 1080p) and file format (MP4 is recommended). The platform will render your video and provide a download link. You can also share the video directly to social media platforms or copy a shareable link to send to your team.
Generating Custom AI Images
To create an AI image, click “Create New” and select “Image.” Then choose “AI Image Generation.” In the prompt box, describe the image you want in detail. For best results, include the subject, environment, lighting, and style. For example: “A close-up shot of a steaming cup of coffee on a wooden table, morning sunlight streaming through a window, photorealistic style.”
Select the aspect ratio (square, portrait, or landscape) and click “Generate.” The AI will produce four variations. You can click on any variation to open it in a larger view. From there, you can download the image, add it to a video project, or continue generating more variations by tweaking your prompt.
Using Automated Video Editing
If you have existing video footage, you can use the automated editor to enhance it. Click “Create New” > “Video” > “Blank Canvas.” Upload your video file by dragging it into the workspace or using the upload button. Once uploaded, click on the video clip in the timeline. A toolbar will appear with options for “Auto Trim,” “Smart Crop,” and “Auto Captions.”
Select “Auto Trim” to let the AI remove silences and dead space from your footage. Use “Smart Crop” to automatically reframe your video for different aspect ratios—this is excellent for turning a landscape video into a vertical one for social media. Finally, click “Auto Captions” to generate subtitles. The AI will transcribe the audio and place captions at the correct timestamps. You can then edit the caption text or change the font style to match your brand.
Tips for Getting the Most Out of Rocketium AI Studio
Write Clear and Specific Scripts
The quality of your text-to-video output depends heavily on your script. Avoid vague language. Instead of saying “our product is great,” describe specific benefits and use cases. The AI uses your text to determine which visuals to select, so include keywords that evoke imagery. For example, if you mention “forest” or “ocean,” the AI will try to find relevant footage.
Leverage Templates for Speed
If you are short on time or unsure about design, start with a template. The template library is categorized by use case, such as “Social Media Ads,” “Explainer Videos,” and “Promotional Banners.” Once you select a template, you can replace the placeholder text and media with your own content. The AI will automatically adjust the layout to fit your brand kit.
Use the Brand Kit Consistently
Do not skip setting up your Brand Kit. Even if you are working on a single project, having your brand colors and fonts pre-loaded will save you from manually adjusting every element. It also ensures that if you generate multiple images or videos, they all look cohesive. Update your Brand Kit whenever your brand guidelines change.
Experiment with Different Styles
The “Style” option in text-to-video is not just cosmetic—it changes the pacing, music, and visual treatment. For a professional corporate video, try the “Clean” or “Modern” style. For a more energetic social media ad, “Bold” or “Dynamic” might work better. Generate the same script with two different styles and compare the results to see which resonates more with your audience.
Collaborate Early and Often
Take advantage of the collaboration tools. Instead of exporting a draft and emailing it to a colleague for feedback, invite them to the project directly. They can leave timestamped comments and make edits in real-time. This streamlines the review process and reduces the number of revisions needed.
Optimize for Each Platform
When exporting, remember that different platforms have different best practices. For YouTube, export in 1080p at 16:9. For Instagram Stories, use 9:16 and keep the video under 60 seconds. For LinkedIn, a 1:1 square video often performs best. Rocketium AI Studio allows you to save multiple versions of the same project with different aspect ratios, so do not be afraid to create variations.
Use the AI Image Tool for Thumbnails
One often overlooked use case is creating custom thumbnails for your videos. Instead of using a generic frame from your video, generate a unique image using the AI Image Creation tool. A compelling thumbnail can significantly increase click-through rates. Just ensure the thumbnail aligns with the content of your video and your brand style.
Keep Learning and Exploring
Rocketium AI Studio is constantly updated with new features and improvements. Check the “What’s New” section in the dashboard or the official blog regularly. The more you experiment with different prompts, styles, and editing tools, the more proficient you will become. Start with small projects, such as a 15-second social media clip, and gradually work your way up to more complex productions.
By following this tutorial, you now have a solid foundation for using Rocketium AI Studio to its full potential. Whether you are generating videos from scratch, creating custom images, or editing existing footage, this platform can dramatically reduce your production time while maintaining high-quality output. The key is to practice, experiment, and integrate the tool into your regular workflow. Happy creating.

Rocketium AI Studio
AI-powered platform for creating and editing videos and images.